How to add a Checkout Location Picker at Checkout in Woocommerce
How to add a location picker at checkout page? Come let’s start, WooCommerce is one of the most popular e-commerce platforms for WordPress and provides a robust foundation for building and managing online stores. Its flexibility and customization options make it an ideal choice for businesses of all sizes.
In the dynamic world of e-commerce, the checkout process is the crucial moment where a potential sale becomes a happy customer. Imagine making this experience even smoother and more efficient. That’s where the Checkout Location Picker comes into play, especially when seamlessly integrated with WooCommerce.
Understanding the Checkout Location Picker at Checkout in Woocommerce:
A Checkout Location Picker is a user-friendly tool designed to enhance the customer experience during the checkout process in your WooCommerce store. It allows customers to pinpoint their exact delivery location on a map, bringing precision and simplicity to the often tedious task of entering a shipping address.
Now, let’s explore how you can consistently integrate a Checkout Location Picker into your WooCommerce store, unlocking a new level of convenience for both you and your customers. From installation to optimization, we’ll guide you through the process to enhance your e-commerce journey. Get ready to simplify and elevate your WooCommerce checkout!
Please follow the following steps to add a location picker at checkout in woocommerce
Purchase and Download:
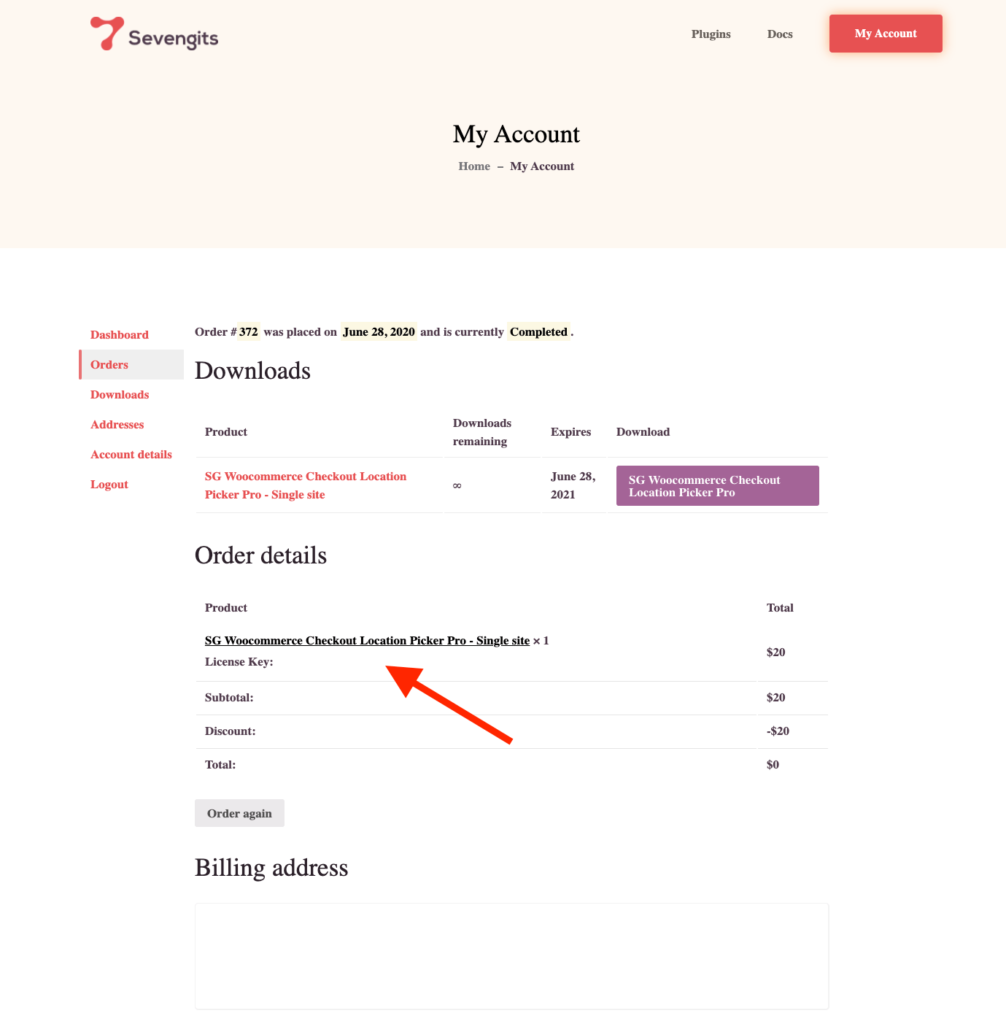
Purchase WooCommerce Checkout Location Picker PRO from Sevengits and check your email for the License key and plugin .zip file.
Get Your License Key
Log in to your Sevengits account to access the license key. It’s valid for a year from the purchase date.
Minimum Requirements woocommerce location picker at checkout
WooCommerce 4.0 or greater
WordPress 4.0 or greater
PHP version 5 or greater
MySQL version 5.6 or greater
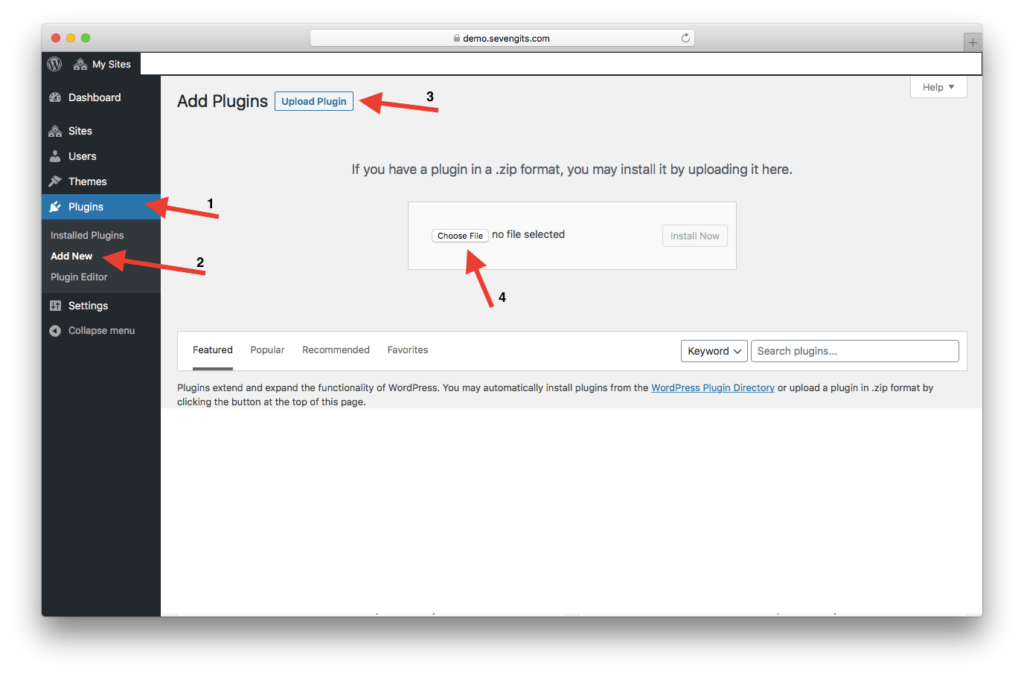
Upload via WordPress Admin Panel
This is the most common method everyone uses. No coding knowledge is required.
- Login to your WordPress website Administration Panel
- Navigate to the Plugin → Add New.
- Click on Upload Plugin button
- Choose the plugin zip file you have just downloaded.
- Click on the Install Now button.
- Once the installation is complete, click on Activate Plugin to activate the installed Plugin.
Upload a Plugin to the WordPress website
Now you’ve finished installing the Pro version of WooCommerce Checkout Location Picker.
Upload via FTP
- Extract the downloaded plugin zip file.
- Upload the folder to your server via FTP to the plugins directory on your WordPress installation (wp-content → plugins).
- Activate the plugin on the Plugins Admin page.
Activation
Go to WooCommerce -> Settings -> Advanced tab -> SG Location Picker Settings. -> Click Enable
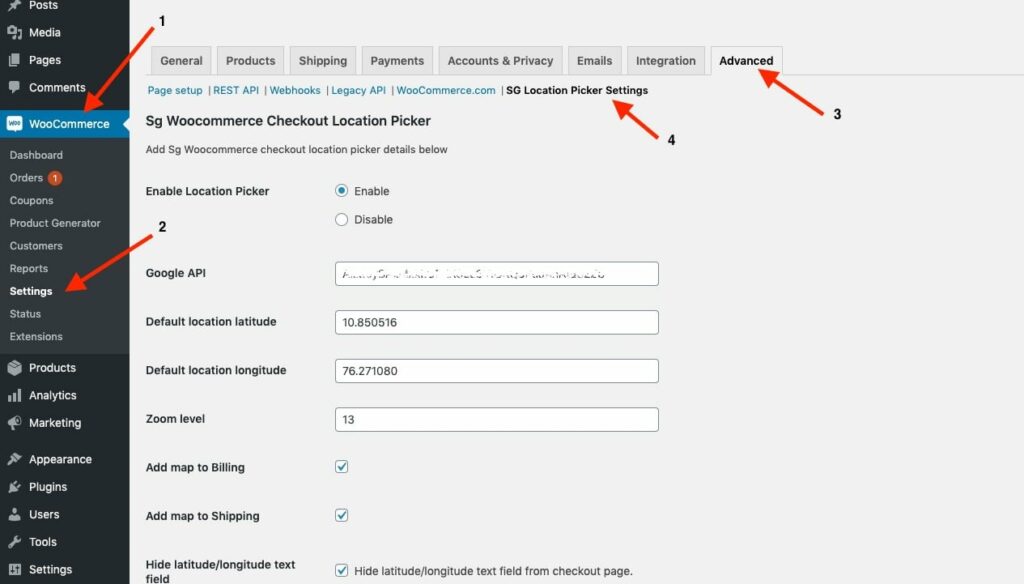
Now you’ve enabled the plugin on your website.
Configuration
Get your Google API Key
This plugin uses the Maps feature. You have to obtain an API key to embed on your website.
To get an API key:
Go to the Google Cloud Platform Console.
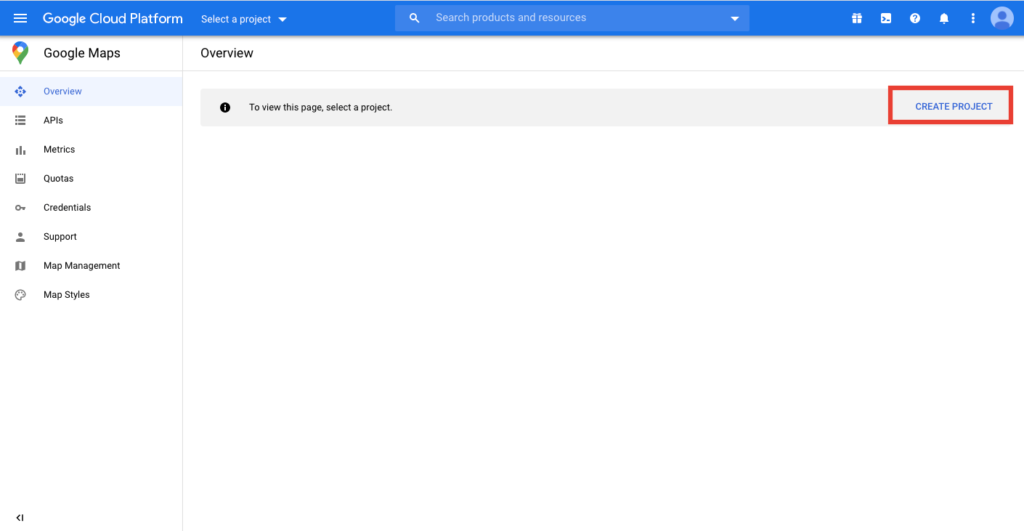
Google Cloud Platform Dashboard
Click the project drop-down and select or create the project for which you want to add an API key.
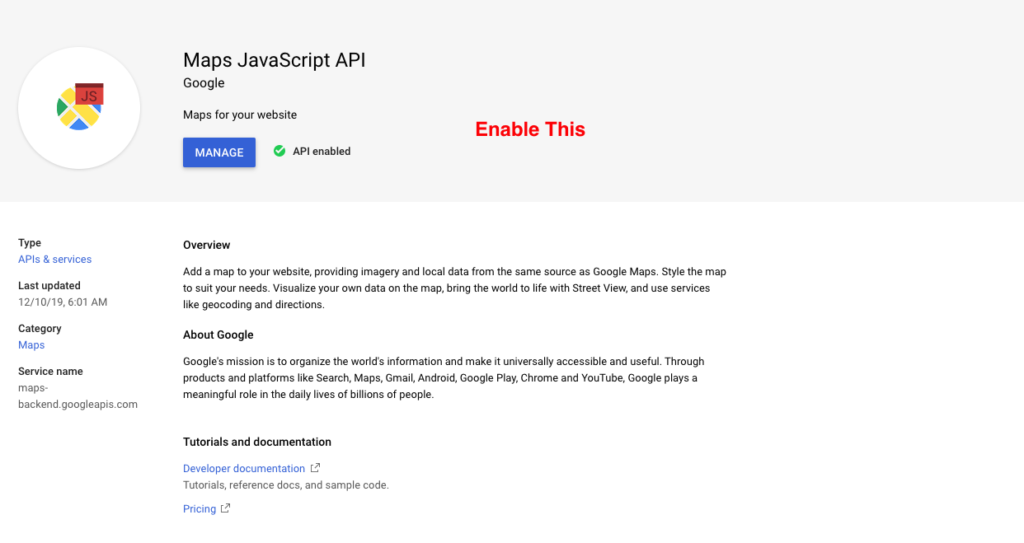
Click Library and Enable Maps Javascript API
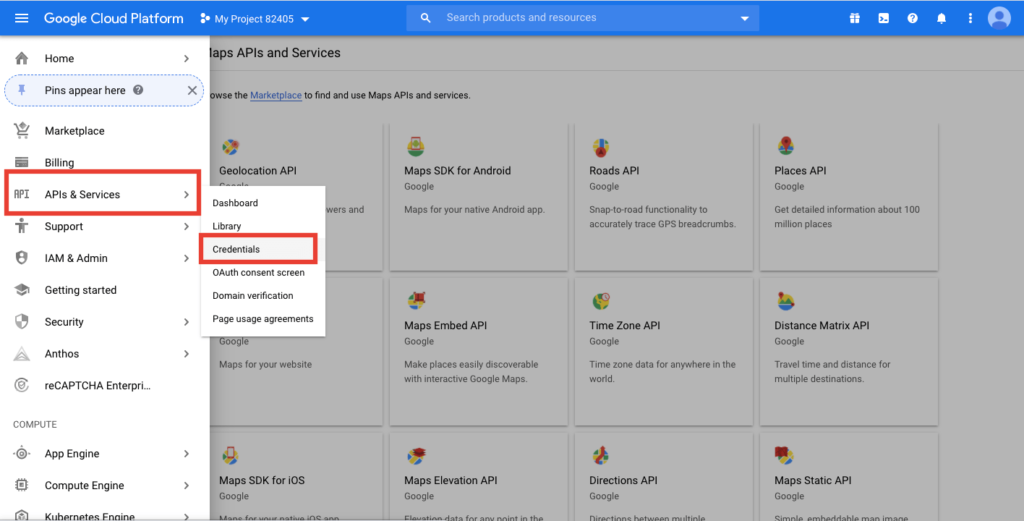
Click the menu button and select APIs & Services > Credentials.
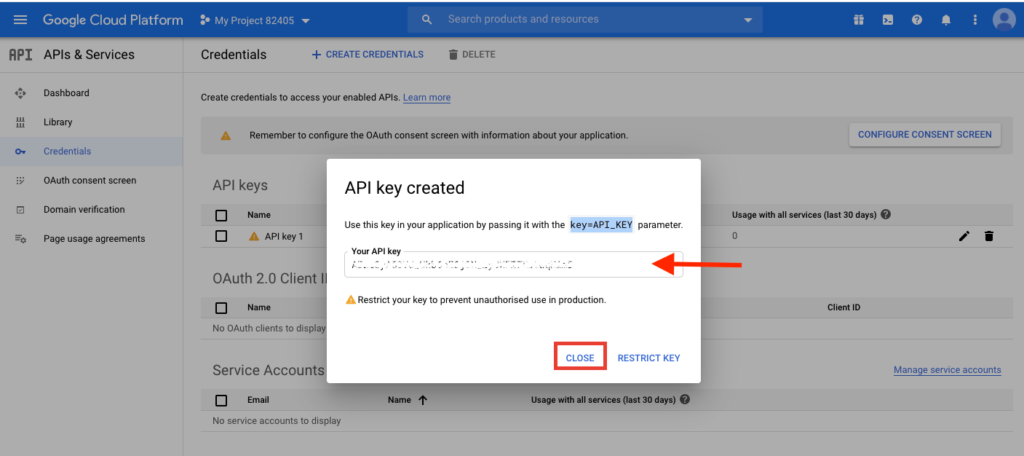
On the Credentials page, click Create credentials > API key. The API key created dialog displays your newly created API key.
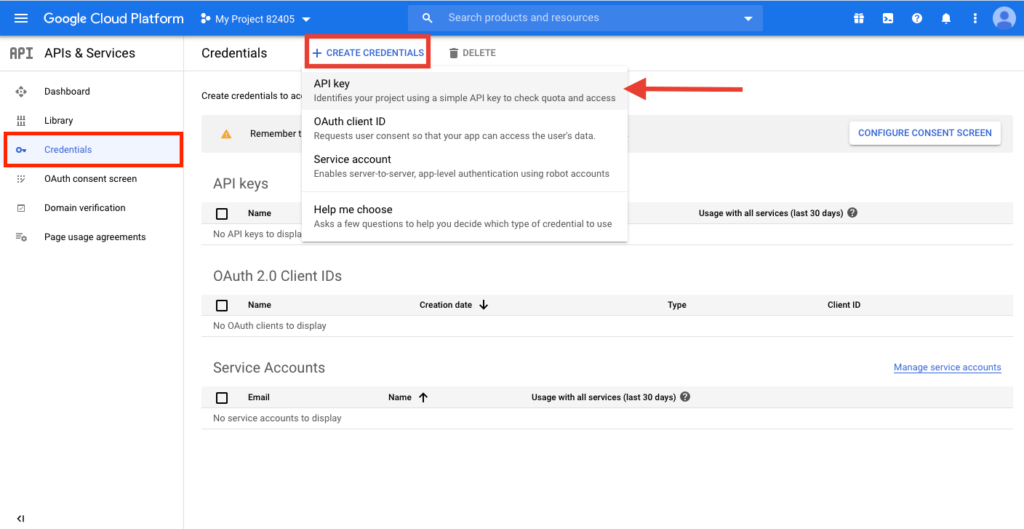
Copy the License Key and Click Close. The new API key is listed on the Credentials page under API keys. (Remember to restrict the API key before using it in production.
How to restrict Google API Key?
We recommend restricting the API key before using it in production. If you don’t restrict your API it will be visible in the browser Console.
On the Credentials page, click the edit icon or the name of the API key that you want to secure.

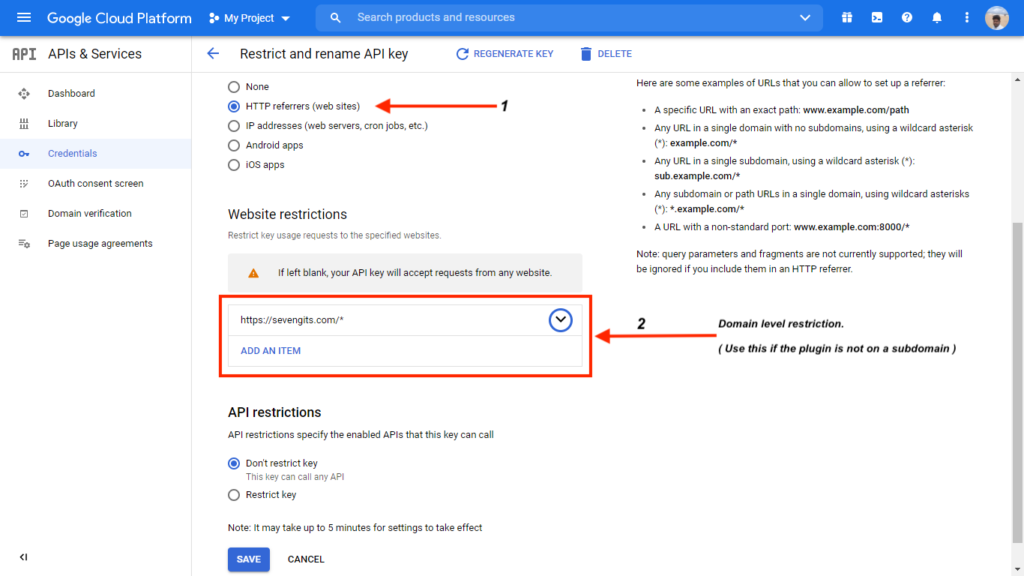
On the Restrict and rename API key page, set the Application restrictions as HTTP referrers (web sites).
If the plugin is installed on your main domain, follow instructions like below screenshot.
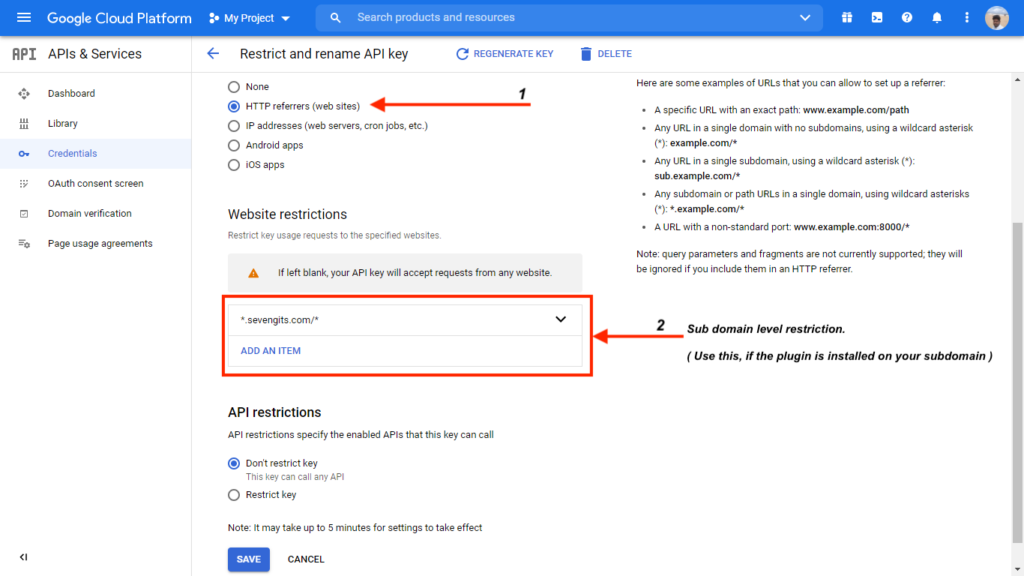
If the plugin is installed on your subdomain, follow the instructions below screenshot.
On the API restriction, select Don’t restrict Key.
Don’t forget to click Save.
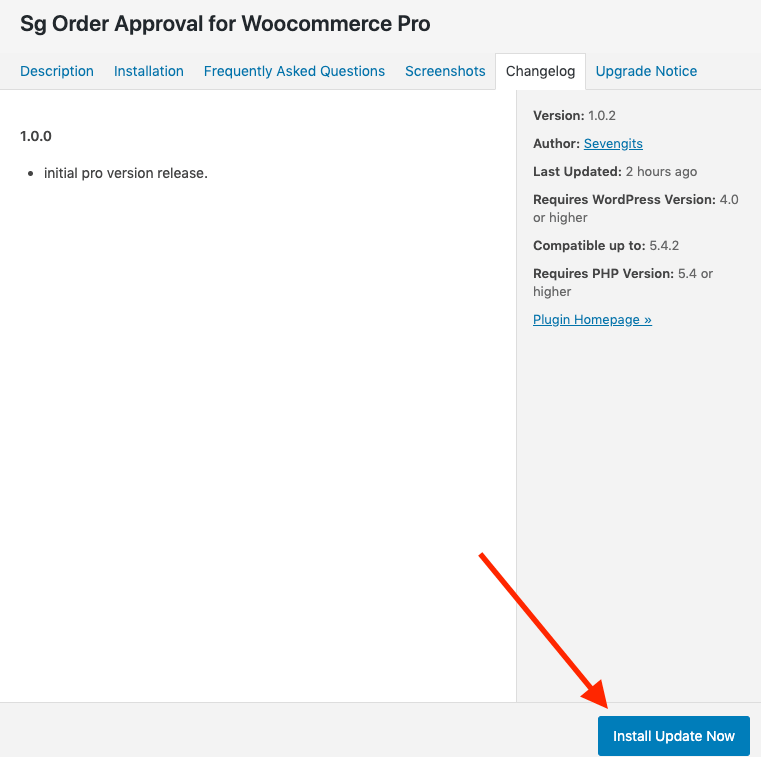
Update
You will be notified about new feature updations along with a changelog. You can read about the fixes and features and can update our premium plugins like how you update other WordPress plugins.

Conclusion
In conclusion, adding a checkout location picker at the checkout stage in WooCommerce is an effective way to optimize your e-commerce platform. By incorporating this feature, you can enhance the user experience and streamline the delivery process, ultimately leading to increased customer satisfaction and improved conversion rates.
visit: https://sevengits.com/plugin/sg-checkout-location-picker-pro/