Dokan Order Approval
With the Dokan Order Approval for WooCommerce plugin, vendors may manage orders placed by customers before payment is processed, giving them significant authority. In the context of multi-vendor e-commerce platforms, this powerful Dokan Order Approval plugin guarantees that the customer’s order is subject to vendor approval or rejection.
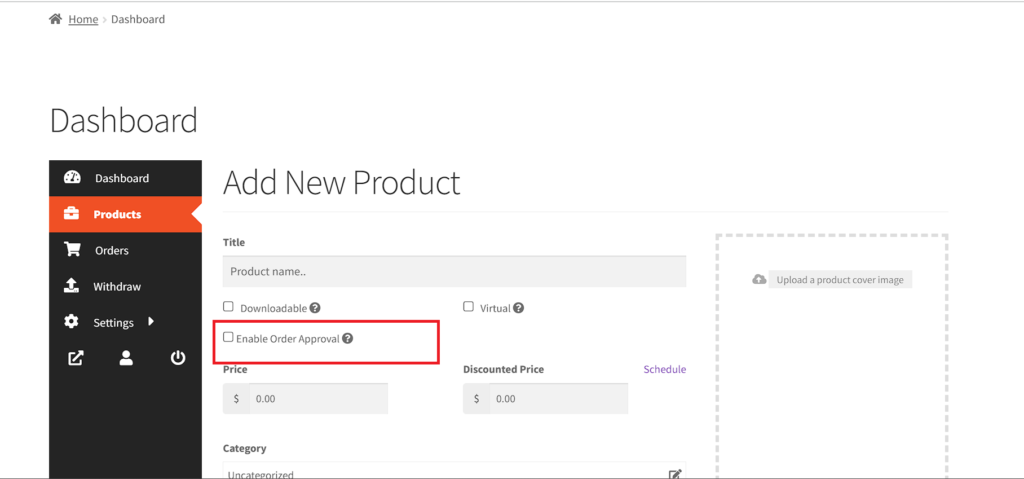
Dokan Order Approval for woocommerce gives vendors the power to accept or reject orders according to the availability of their inventory and degree of fulfillment capability. Known also as the Vendor Approval for Order Plugin, this functionality efficiently reduces common e-commerce problems including overselling, stockouts, and the necessity for needless refunds.
WooCommerce Vendor Order Approval or Doken Order Approval For Woocommerce becomes a crucial solution for WooCommerce websites that have many suppliers. It enables suppliers to have exact control.
Installation
To install our Dokan Order Approval for Woocommerce plugin, you have to purchase it from our WordPress plugin website – Sevengits.
After completing the purchase, you can log in to your WordPress website account and download the plugin file as well as the License Key.
IMPORTANT NOTE
This dokan order approval plugin will only work if you have either the Order Approval for Woocommerce or Order Approval for Woocommerce Pro and Dokan order approval For woocommerce plugin installed and activated.
Dokan Order Approval For Woocommerce-How to get a License Key?
You will get the license from your Sevengits account. All license keys are valid for a year from the day of purchase. After completing the order, you will get an email from us with a link to access your account. From your account, you can download the Dokan order approval plugin to your system.
Your license key is valid for 12 months from the date of purchase.
Upload via WordPress Admin panel
This is the most common method everyone uses. No coding knowledge is required.
- Login to your WordPress website Administration Panel
- Navigate to the Plugin → Add New.
- Click on the Upload Plugin button
- Choose the plugin zip file you have just downloaded.
- Click on the Install Now button.
- Once the installation is complete, click on Activate Plugin to activate the installed Plugin.
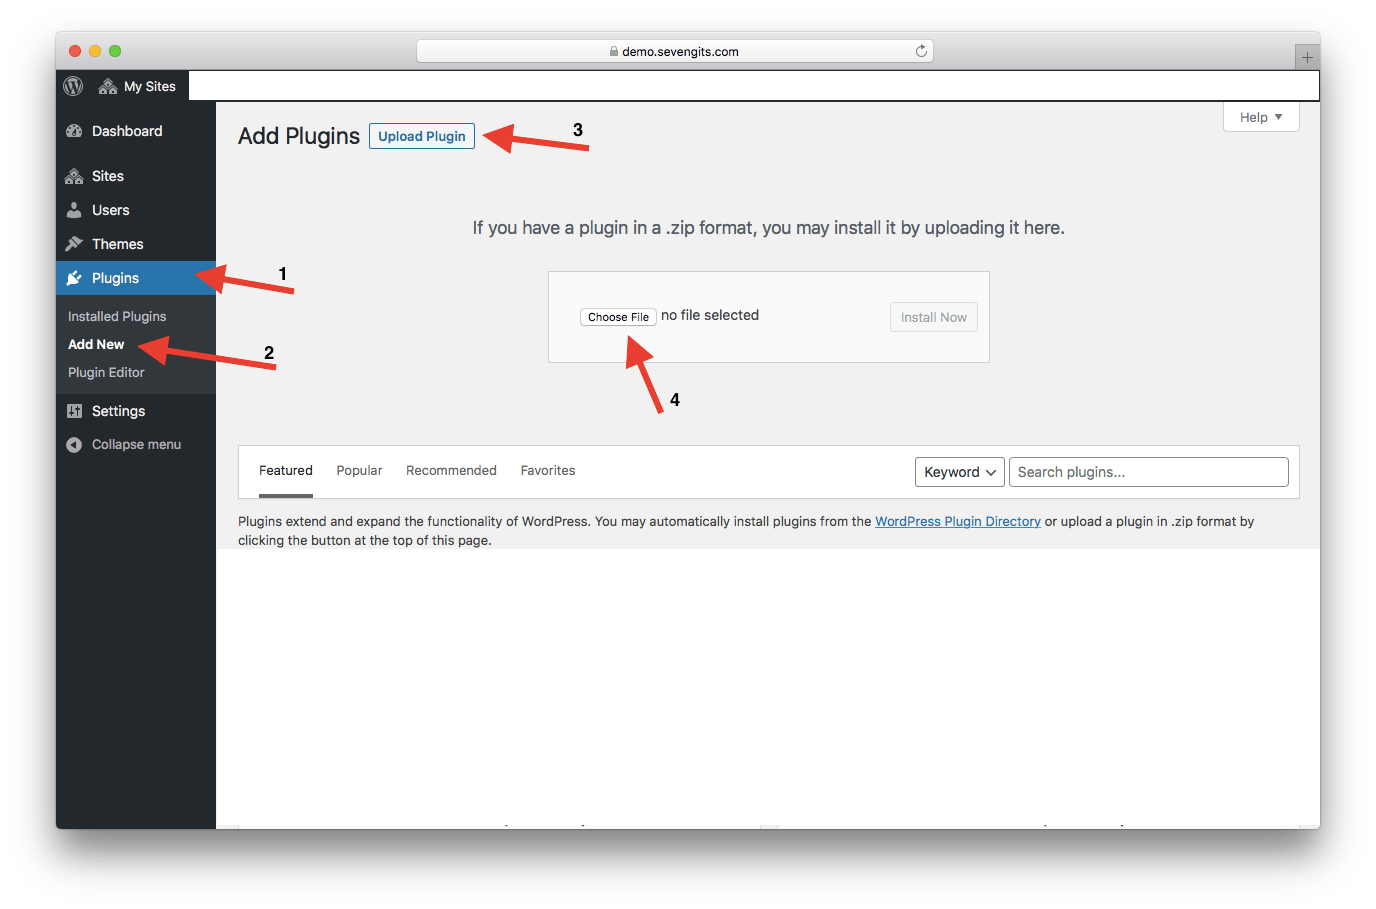
Now you’ve finished installing the Pro version of Dokan Order Approval.
Upload via FTP
- Extract the downloaded dokan order approval for woocommerce plugin zip file.
- Upload the folder to your server via FTP to the plugins directory on your WordPress installation (wp-content → plugins).
- Activate the plugin on the Plugins Admin page.
Activation
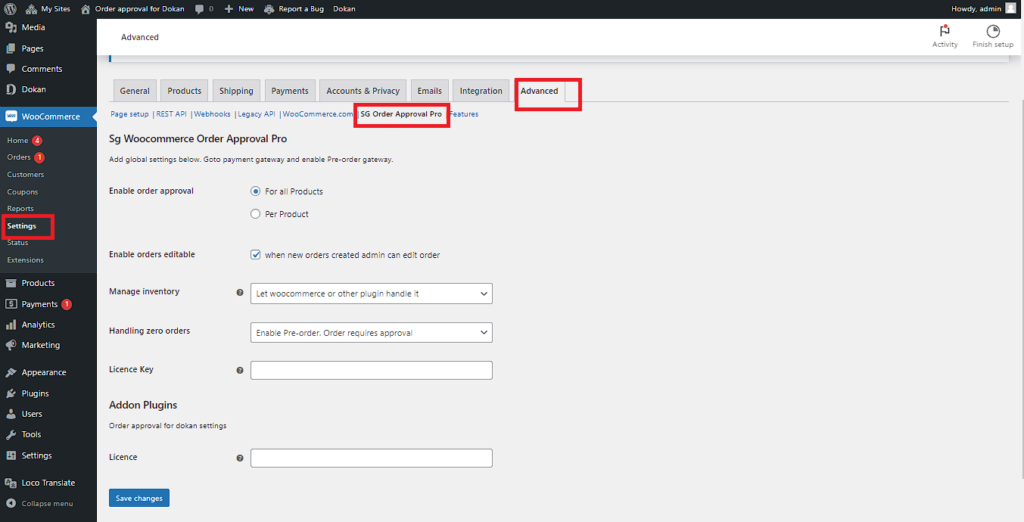
Go to WooCommerce -> Settings -> Advanced tab ->Order Approval -> Addon plugins -> License key ->Save changes
Now you’ve enabled the plugin on your website.
Configuration
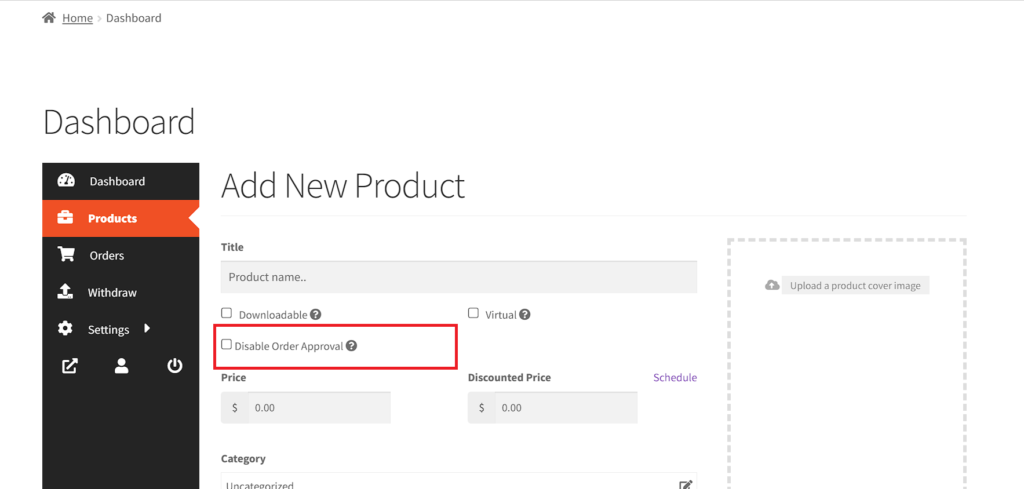
Dokan Order Approval for Woocommerce Plugin has to be configured by the admin. After the initial setup, the dokan order approval plugin options will be enabled on the vendor/seller dashboard.
Shop Owner settings page
Shop Owner Demo Page: https://demo.sevengits.com/dokan-order-approval
Vendor Settings Page
Username: vendor
Password: vendor
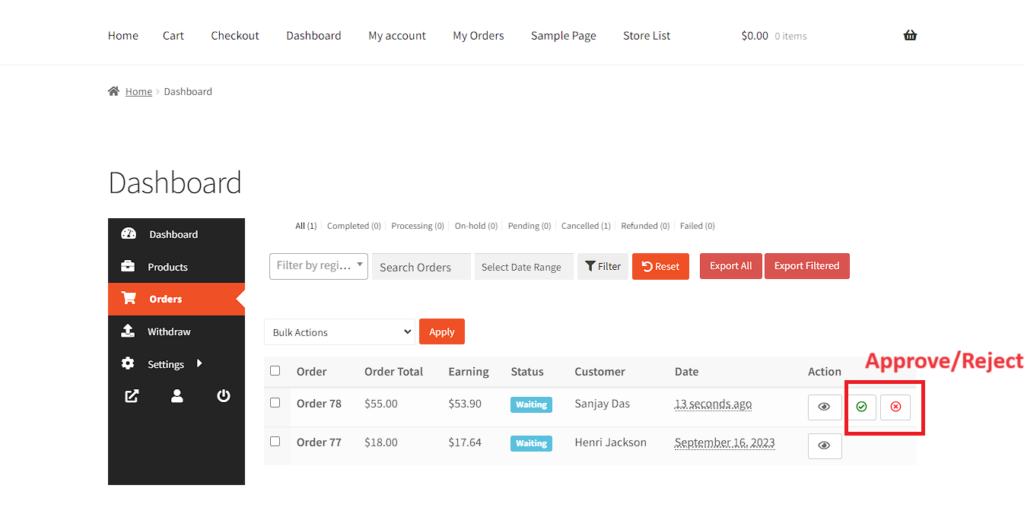
The Multi-Vendor dashboard is a product of Dokan. It becomes more useful when we integrate our plugin.
In the Orders tab, you can see the orders that were received for your items. On the right end, we have added a new column called “Actions” where you’ll get the additional feature to accept and decline orders.
Update
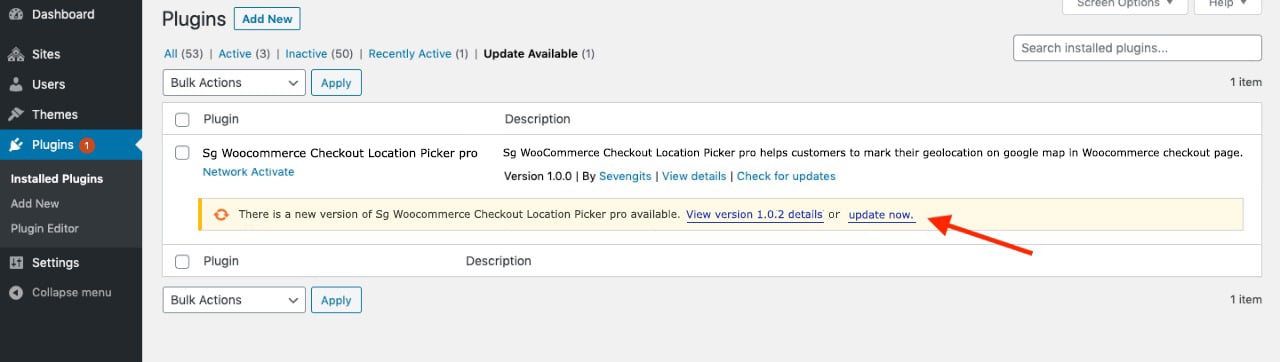
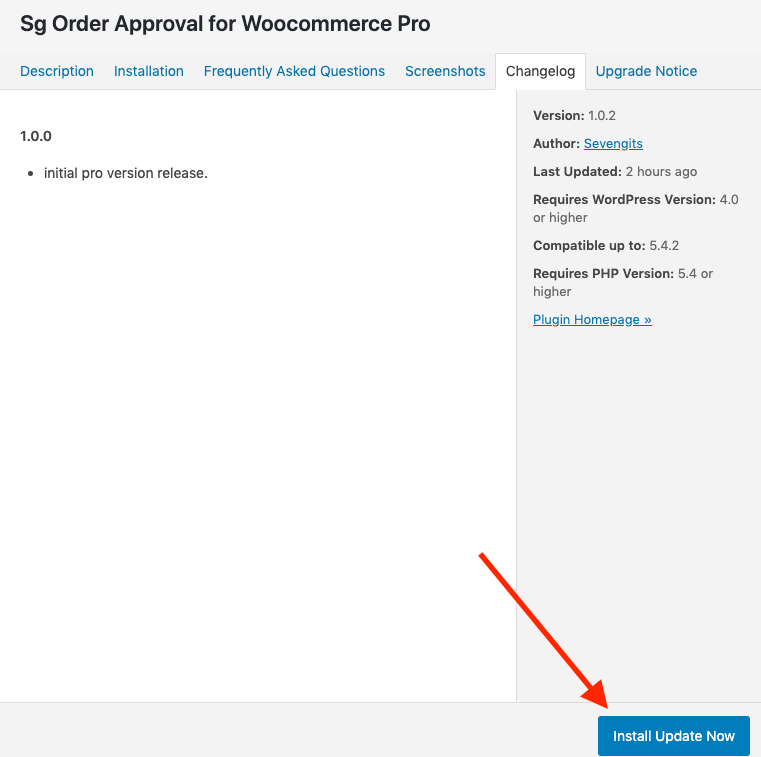
You will be notified about new feature updations along with a changelog. You can read about the fixes and features and can update our premium plugins like how you update other WordPress plugins.
Support
If you purchased a premium version of dokan order approval plugin from us with a valid license key ( Kindly mention your license key in the subject line ). Contact us.
Doken Order Approval Plugin For Woocommerce