WC Messaging Pro Sending Flows
WhatsApp Flows is a feature of the WhatsApp Business Platform that allows businesses to create interactive experiences with customers within WhatsApp. It combines automated messages with buttons, lists, and forms to guide users through specific actions and processes.
You can use Flows to generate leads, recommend products, get new sales leads, or anything else where structured communication is more natural or comfortable for your customers.WC Messaging now supports WhatsApp Interactive Flows, enabling step-by-step guided interactions with customers. Create dynamic, multi-screen conversations for a smoother and more engaging experience.
How to Get Permission to Use Flows
To enable Flows for your WhatsApp Business account, you need to meet specific criteria:
Messaging Limit Requirements:
You must send at least 1,000 business-initiated conversations within 30 days.
This shows WhatsApp that your business is active and engaging with customers consistently.
Once this threshold is reached, you can request or automatically receive permission to use Flows.
Permissions are granted based on your compliance with WhatsApp’s messaging policies.
How Flows Work
Flows help streamline communication, saving time for both customers and businesses.
With interactive steps, it’s easier to gather accurate information.
Using Flows, businesses can ask predefined questions to gather customer feedback or collect data.
For example, a flow might guide a customer through choosing a product by asking questions like “What product are you interested in?” with options to select, followed by “What’s your budget range?” Based on the responses, the business can provide tailored recommendations or solutions. Flows not only save time but also ensure accurate and meaningful interactions, making them a powerful tool for enhancing business messaging strategies.
Creating flows
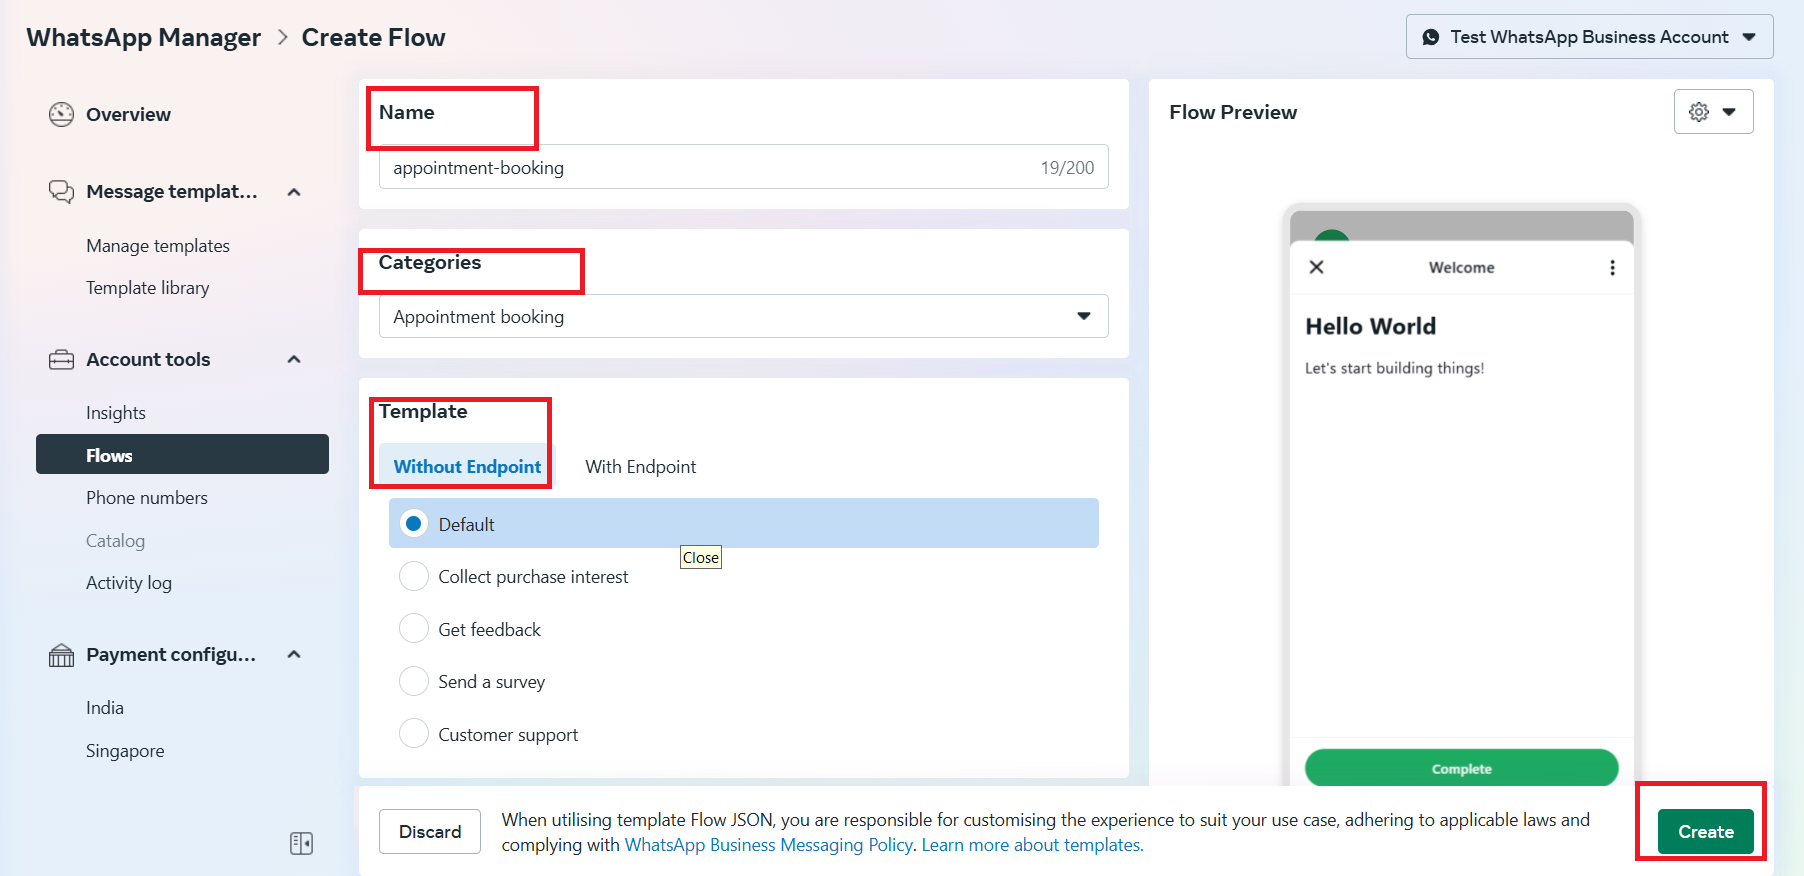
To create a flow, start by going to your WhatsApp app dashboard. Navigate to WhatsApp > Quickstart > WhatsApp Flow and then click on Create Flow. Once there, the first step is to enter a name for your flow. After that, choose a category that best fits the purpose of your flow—this could be something like “Customer Support,” “Feedback Collection,” or “Product Recommendation.” You have the flexibility to select categories based on your specific needs and preferences.
Template with Endpoint: This type of flow includes a clear conclusion or call to action at the end of the conversation. For example, it may lead to a purchase link, appointment booking, or a final confirmation message. It ensures the user knows the process is complete and gives them a next step.
Template without Endpoint: These flows are more open-ended. They’re used for ongoing interactions, such as collecting additional data or engaging in dynamic conversations without a defined stopping point. This is useful when the conversation requires further follow-up or manual intervention.
By understanding these differences, you can design flows that perfectly suit your business needs and provide the best possible experience for your customers.
After clicking the Create option, you’ll see a code editor where you can define the logic and design for your flow. This is where you configure the number of screens, set headings, define options, and specify the expected outputs for your flow. You’ll customize the flow structure to suit your specific requirements.
If you’re unsure how to write the code for your flow, Facebook provides an excellent tool called the Flows Playground .
This tool allows you to create and preview your screens interactively. You can design your preferred screens step by step, including headings, input fields, and button options. A demo is available to help you visualize how your flow will look and function.
Once you’ve finalized your flow in the Playground, simply copy the generated code and paste it into the code editor in your WhatsApp dashboard. This makes it easy to build and implement customized flows tailored to your business needs.
Next, we’ll move on to how to get these flows under templates, which allows you to send flows to customers without requiring them to trigger the conversation first. Additionally, we’ll explore how this works seamlessly with WC Messaging Pro.
Create flows under templates
Now, let’s see how to create flows under templates in a simple and friendly way!
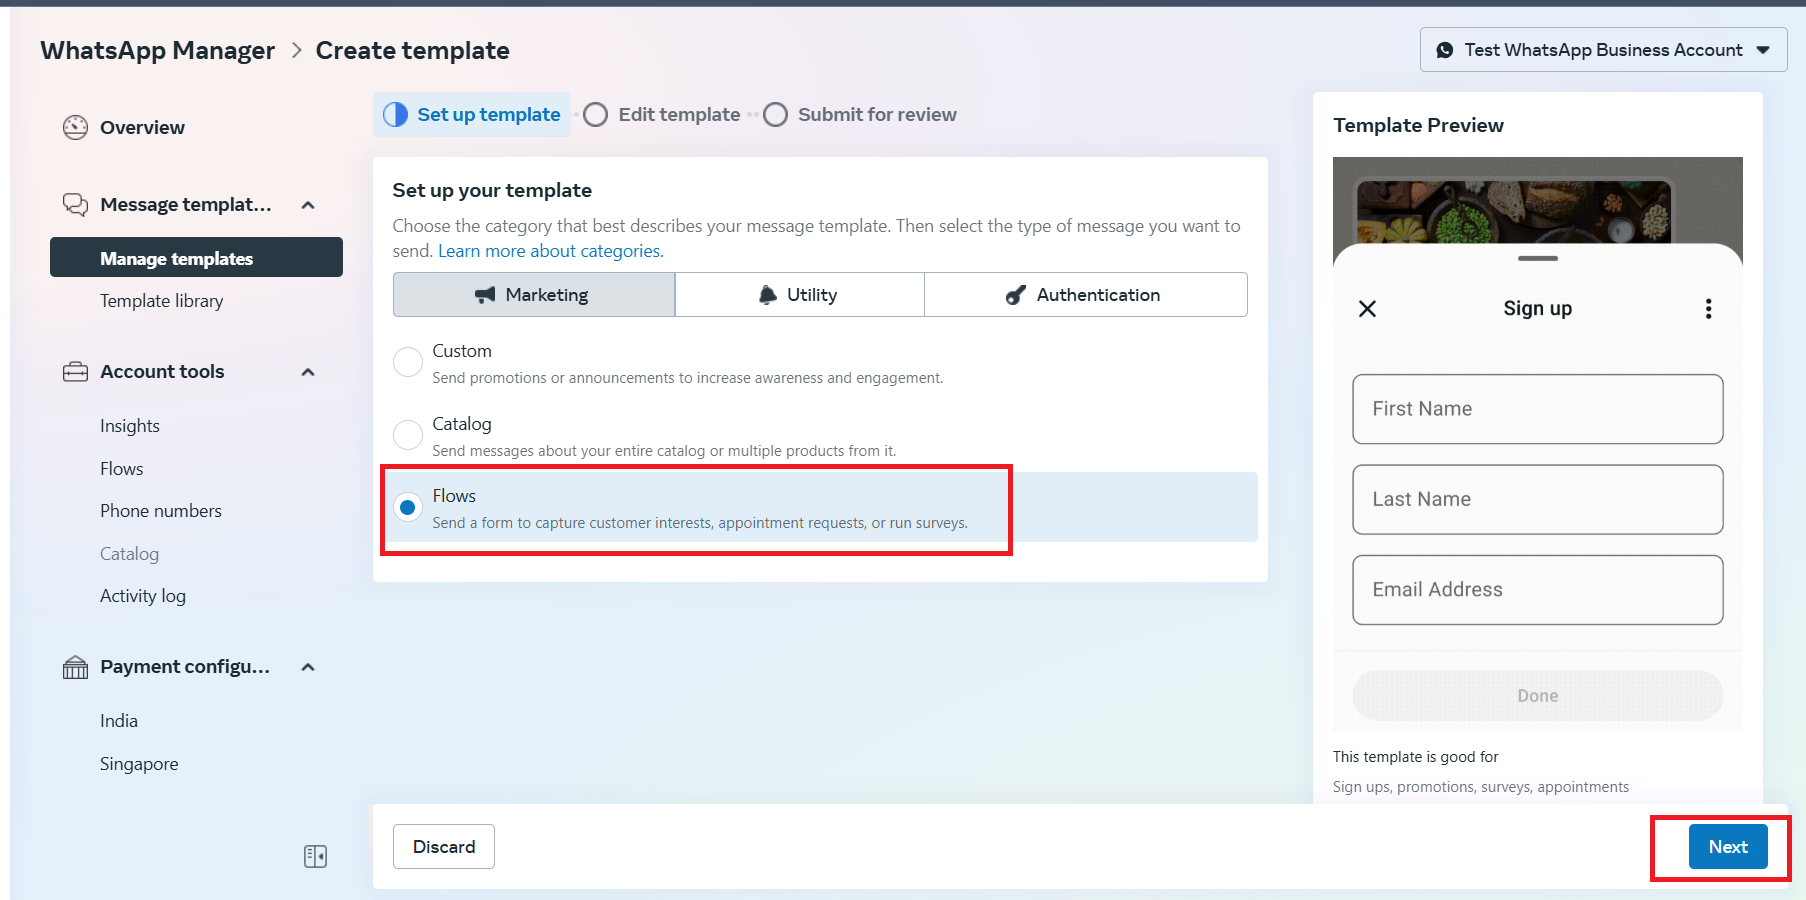
First, go to WhatsApp Manager and click on Create Template. Select the category, choose Flows, and then click Next. Here, you’ll need to provide a Template Name and select the Language for your template.
After that, you’ll move on to the Flow Setup. In this step, you’ll see options for creating a new flow or using an existing flow. Choose Existing Flow and select the one we created earlier. Once selected, you’ll see your screens displayed exactly as you designed them.
Now, you can customize the template further. Add a body text, which will be the message your customers see upfront when you send this flow as a template. For example, you could write something like, “Hi! Please provide your details to confirm your appointment.” You can also change the button text to something more engaging, like “Start Booking” or “Begin.”
Once everything looks good, preview your template to ensure it’s perfect, and then click Submit for Review. After the template is approved, you’re all set to send it to your customers!
With this setup, you can send the flow effortlessly using WC Messaging Pro, allowing you to provide a seamless and professional experience for your customers.

Setting up on WC Messaging
Now let’s see how to manage and send your flows using WC Messaging Pro.
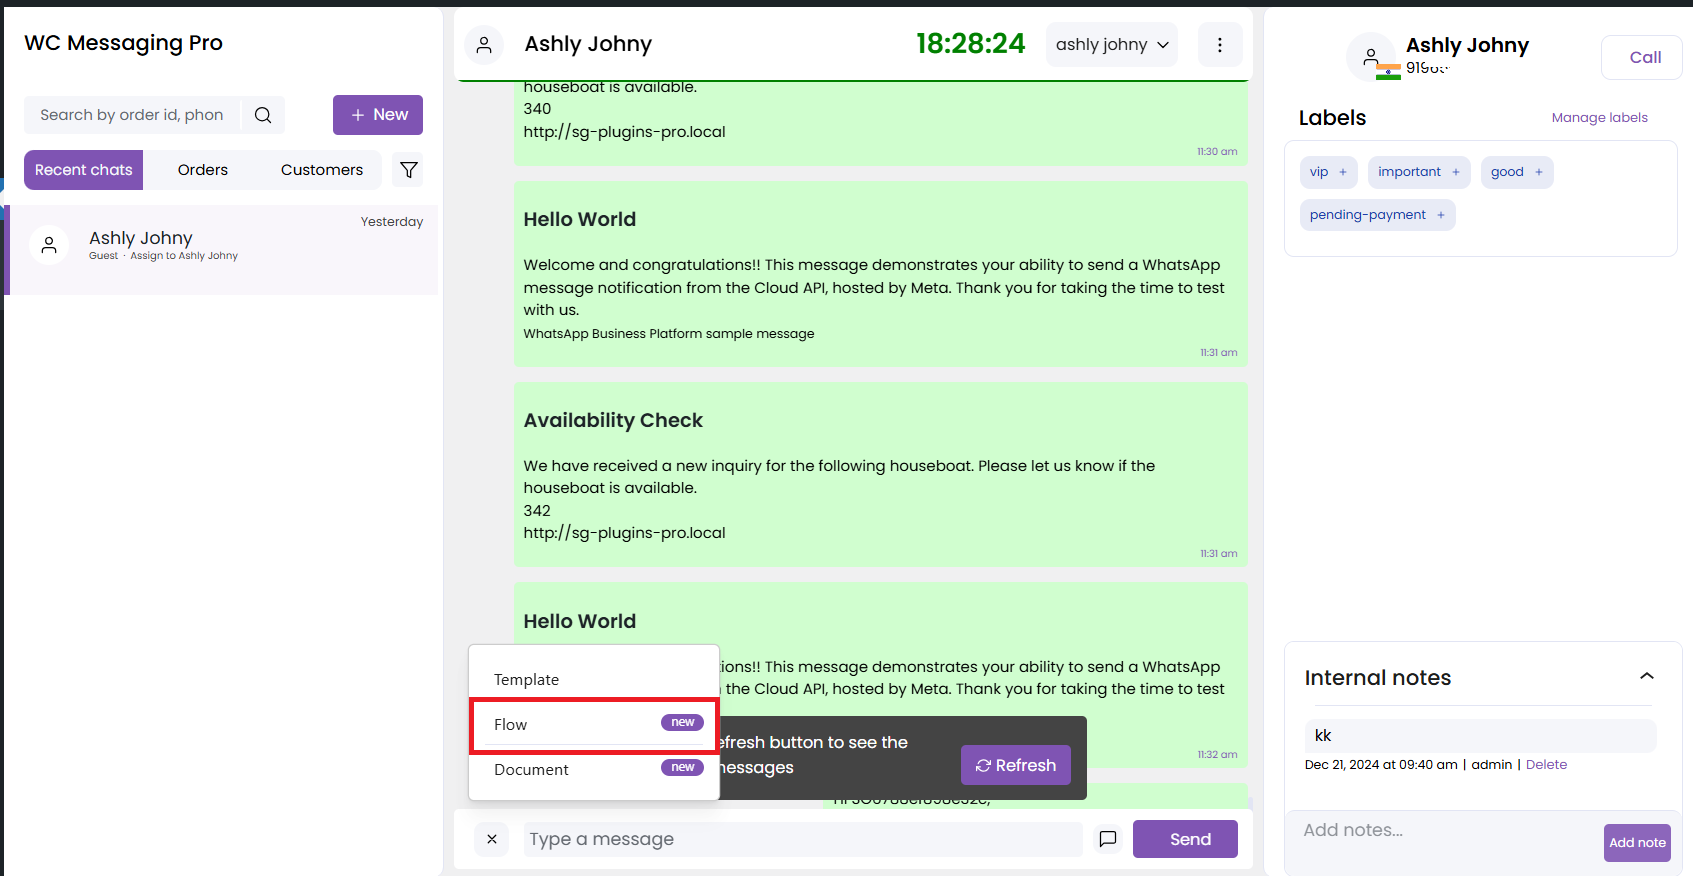
Start by going to your WC Messaging Dashboard, then navigate to Settings > Template Settings. Use the Sync option to fetch all your approved templates, including the flow template you just created. Once synced, head over to your Chat Dashboard, where you’ll find your flows listed. Simply select the desired flow and send it to your customers. How easy is that, right?
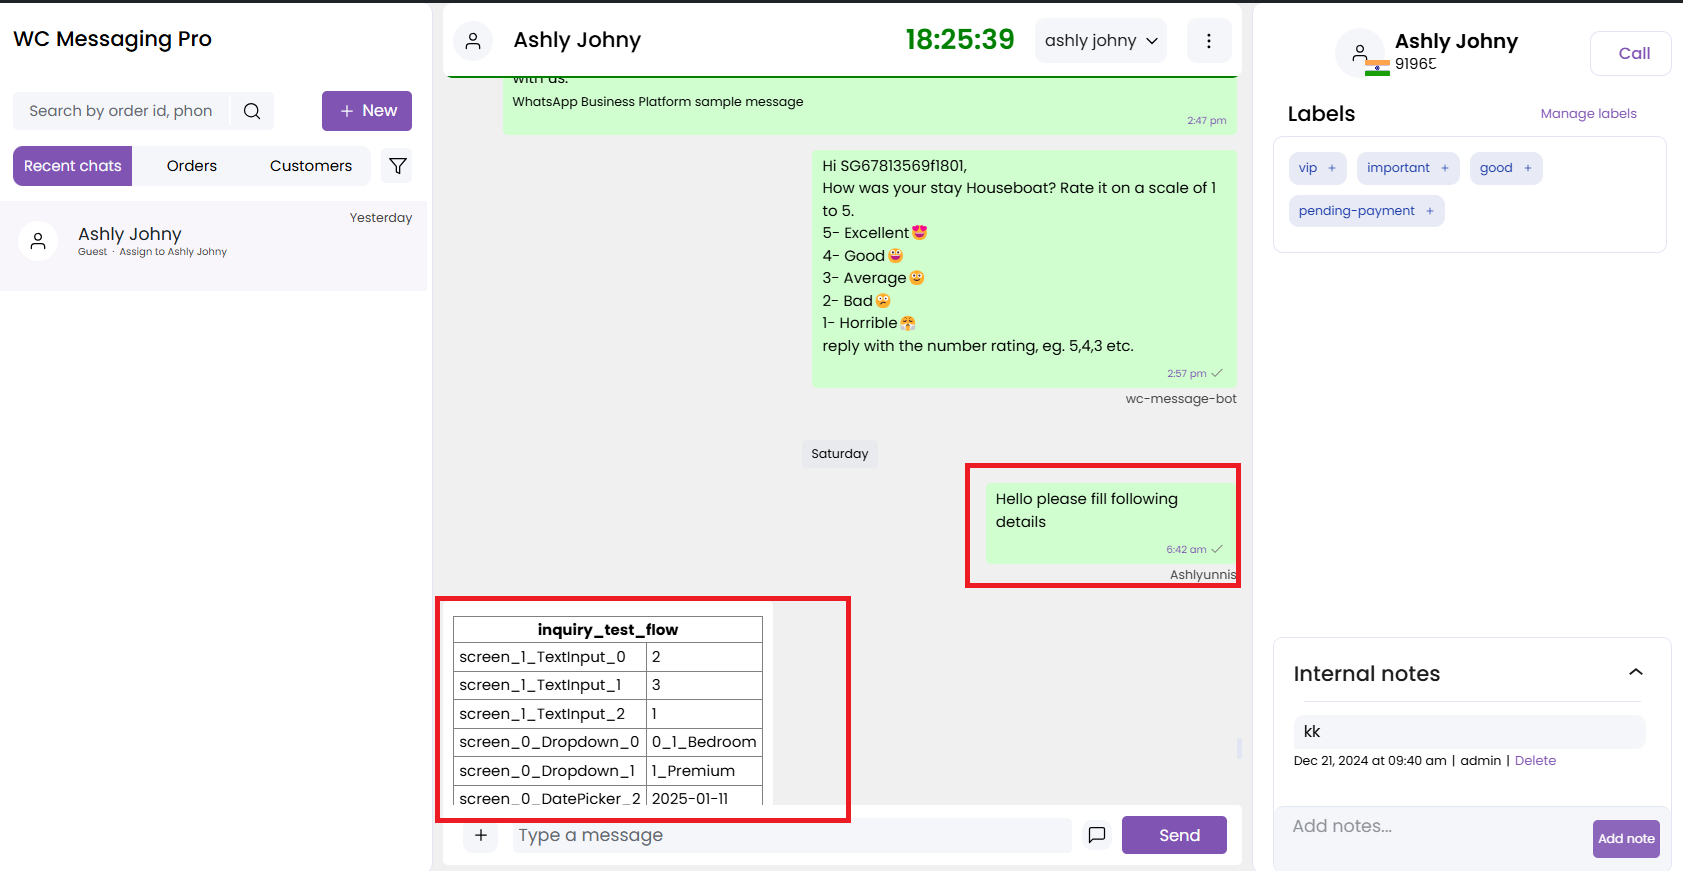
Once sent, you’ll be able to see the message body appear in the chat.”
Now, when customers reply to your flow, their responses will appear in a table format. The table is named after your flow template, making it easy to identify. By look on the table, you can view the screen IDs and their corresponding values as received from the customer.
If you want to modify the flow’s look or functionality, it’s super simple. Go to your flow’s Code Terminal and select the Edit option.
