WC Messaging Team
The WC Messaging Team Plugin simplifies team communication with Admins managing chats and assigning leads, while Operators focus on chatting with assigned leads using quick replies.
The WC Messaging Team plugin serves as an add-on for WC Messaging, designed to enhance sales and team management capabilities. With this plugin, businesses can establish desired teams tasked with managing specific groups of chats. Under the guidance of a team lead, chats are assigned to individual team members for efficient handling. Each team member gains access to their assigned chats, enabling them to view, respond to, and follow up on inquiries or conversations independently. This streamlined approach fosters better organization, delegation, and responsiveness within the sales or support teams, ultimately leading to improved customer satisfaction and increased productivity.
The WC Messaging Team plugin features both a web application and a mobile app, providing easy access to the WC Messaging dashboard so that operators and admins can log in to chats anytime and from anywhere.
Features
- Develop a sales or desired teams
- The team leader will assign the lead/chat to team members
- Team members only have the accessibility of his desired chat
- Chat visibility depends upon the roles of the members
- Role-based access control
- Real-time Chat Updates
- Enable notifications.
- Ensure immediate awareness of new assignments
- Implemented web/mobile application for easy access of chats
Installation
Log in to your WordPress admin dashboard.
- Go to “Plugins” in the left-hand menu.
- Click on “Add New.”
- Upload the “WC Messaging Team” zip folder purchased from the Sevengits website.
- Click on the “Install Now” button next to the plugin you want.
- Once installed, click on the “Activate” button.
- You’re done! The WC Messaging Team plugin is now installed and active on your WordPress website.
- Goto WooCommerce -> settings -> Wc Messaging
Settings Page
Go to WC Messaging -> settings ->Teams
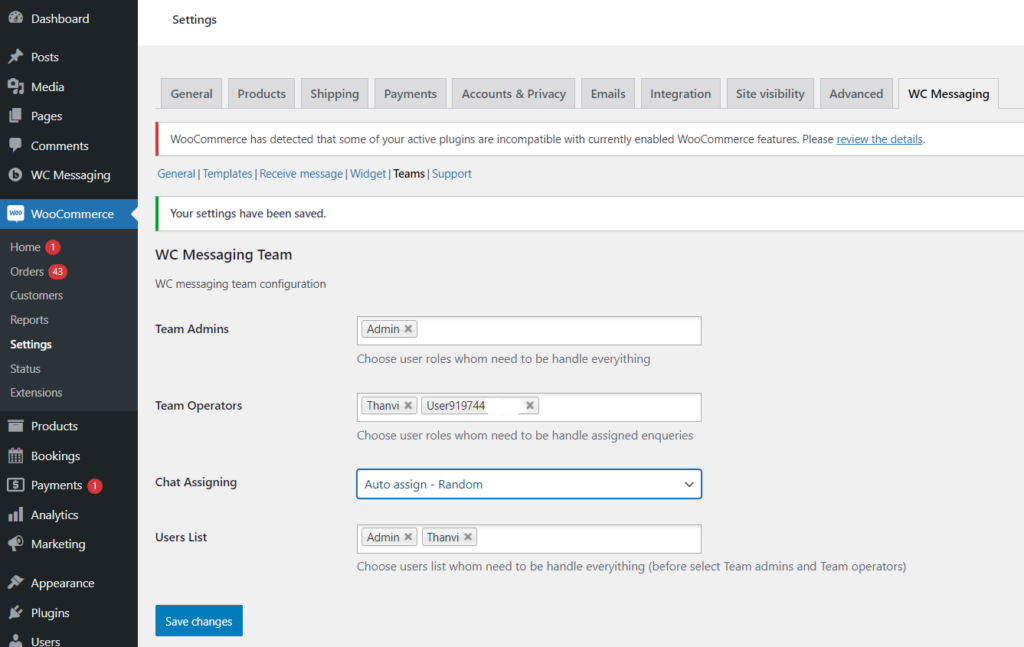
- License key: The license key can be obtained from sevengits website
- Team Admins: You can choose preferred admin list from all user list
- Team Operators: You can choose your team operators list from given list
- Chat Assigning: Choose desired chat assigning method given from list
- Users list: Shows the combination of team admins and operators,you can choose them for assign the chats. They will get the chats assignments as preferred in Chat Assigning order.
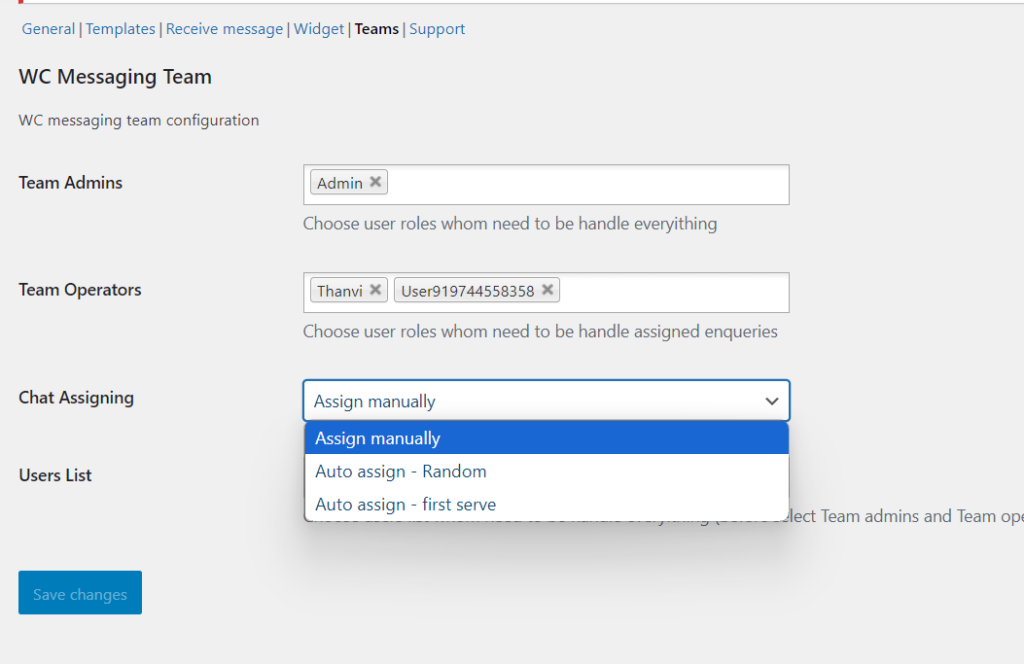
You can see 3 options in Chat Assigning :
Assign Manually: You can manually assign chats to members in the Users List. You can assign each chat via the WC Messaging Chat dashboard. There is an option to assign each chat to members of the Users List.
Auto assign – Random: Using this option, each chat can be assigned randomly. Each member in the Users List will be randomly assigned chats.
Auto assign – first serve: Using the auto-assign first-serve option, each chat will be assigned to Users List members on a first-come, first-served basis. Each chat will be assigned in the ascending order of the Users List.
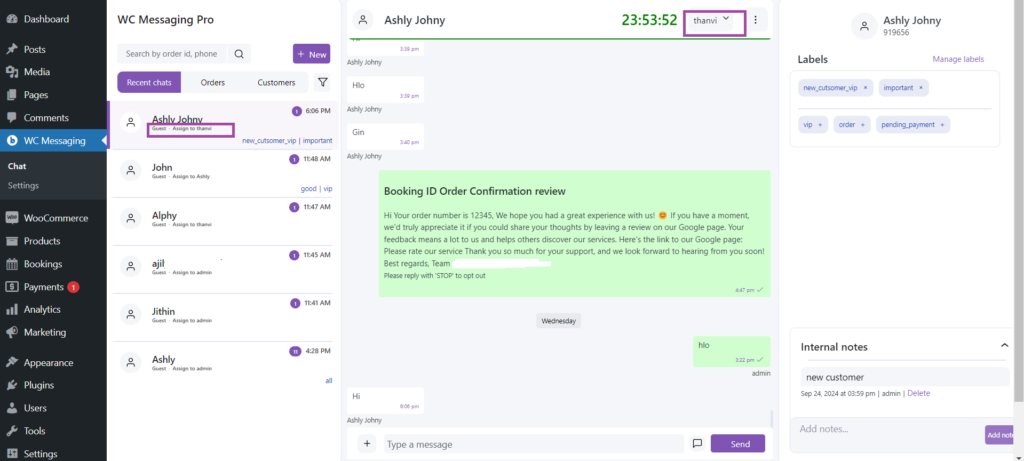
The picture clearly shows the chats section, where we can see the assigned chats and the “Assign” option on the right side of the chat section.
Setup apps in desktop/phone
Create a new page on your site, name it “WC Messaging Dashboard,” select “WC Messaging Dashboard” as the template, and publish the page.
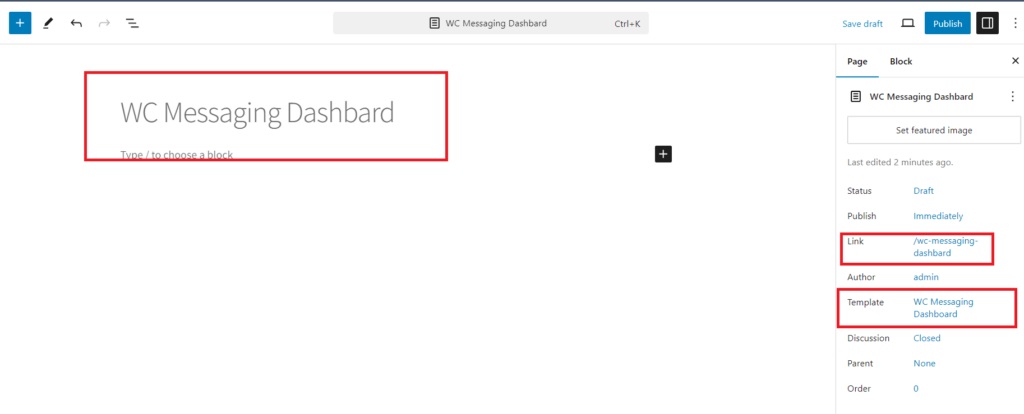
If your page link is like https://your-site-name/wc-messaging-dashboard/, then it’s fine. If you visit that link, you’ll see a downloadable link. Download it, and you’ll be able to access it directly from your local system.
If your page link is different, such as https://your-site-name/chat-dashboard/, go to your WC Messaging Team plugin folder, then navigate to public -> wc-messaging-app -> and find the manifest.json file. Copy it and paste it into your themes folder. Then, change the “start_url” to your URL, like this: "start_url": "https://your-site-name/chat-dashboard/". After that, you can download it as described above.

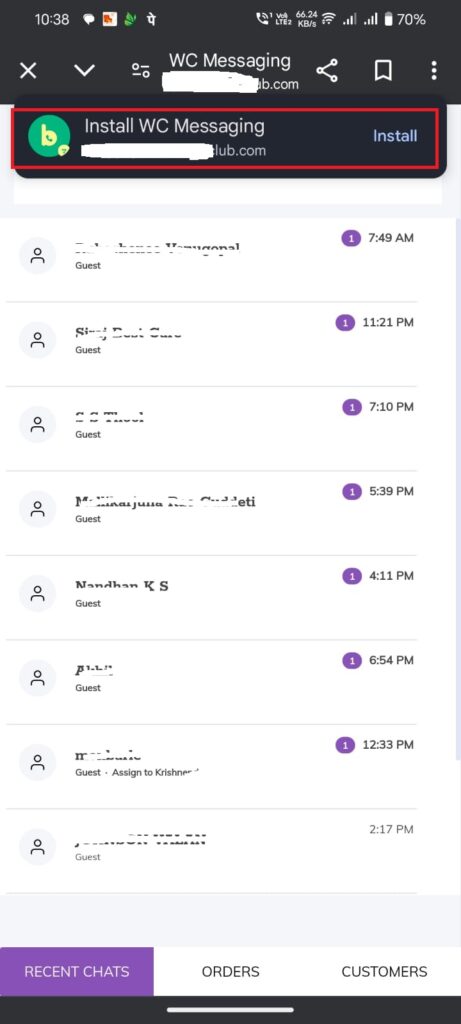
If you want to download it to your mobile phone, paste this link into your browser. You should see an install button to download it. You can see it in the figure below.
