SG WooCommerce Checkout Location Picker Pro
The woocommerce checkout location picker is a user-friendly plugin designed to enhance the shopping experience on your woocommerce platform. This Geolocation Picker tool empowers customers to easily pinpoint their geolocation or desired delivery point directly on a map within the WooCommerce checkout page. The location picker plugin’s functionality is straightforward: it converts the shipping address entered by the customer into precise coordinates, including latitude and longitude. This ensures an efficient and consistent delivery process with precise location accuracy, reducing any potential inconvenience for both customers and businesses. With features like a location picker at checkout for WooCommerce and Google address autofill for WooCommerce, this plugin is a valuable addition to any online store.
Free Vs Premium
| FEATURES | FREE | PRO |
| Translation ready | No | Yes |
| Automatic geo-position | No | Yes |
| Custom Marker Support | No | Yes |
| Enable/Disable Long/Lat fields | No | Yes |
| Toggle button for hide or show map | No | Yes |
| Show map in order dashboard | No | Yes |
| 1-year Support | Via WordPress forum | Email Support |
location picker Installation
To install our woocommerce checkout location picker PRO version, you have to purchase the plugin from our WordPress plugin website – Sevengits.
After completing the purchase of checkout location picker plugin , you will get an email from us with a License key and a .zip file with the plugin in it. You have to Download the woocommerce checkout location picker Plugin to your system.
Note: Activating both the free and premium versions of a woocommerce checkout location picker plug-in at a time will break some features. Either activate the free or premium version of the woocommerce checkout location picker plugin to enjoy full functionality.
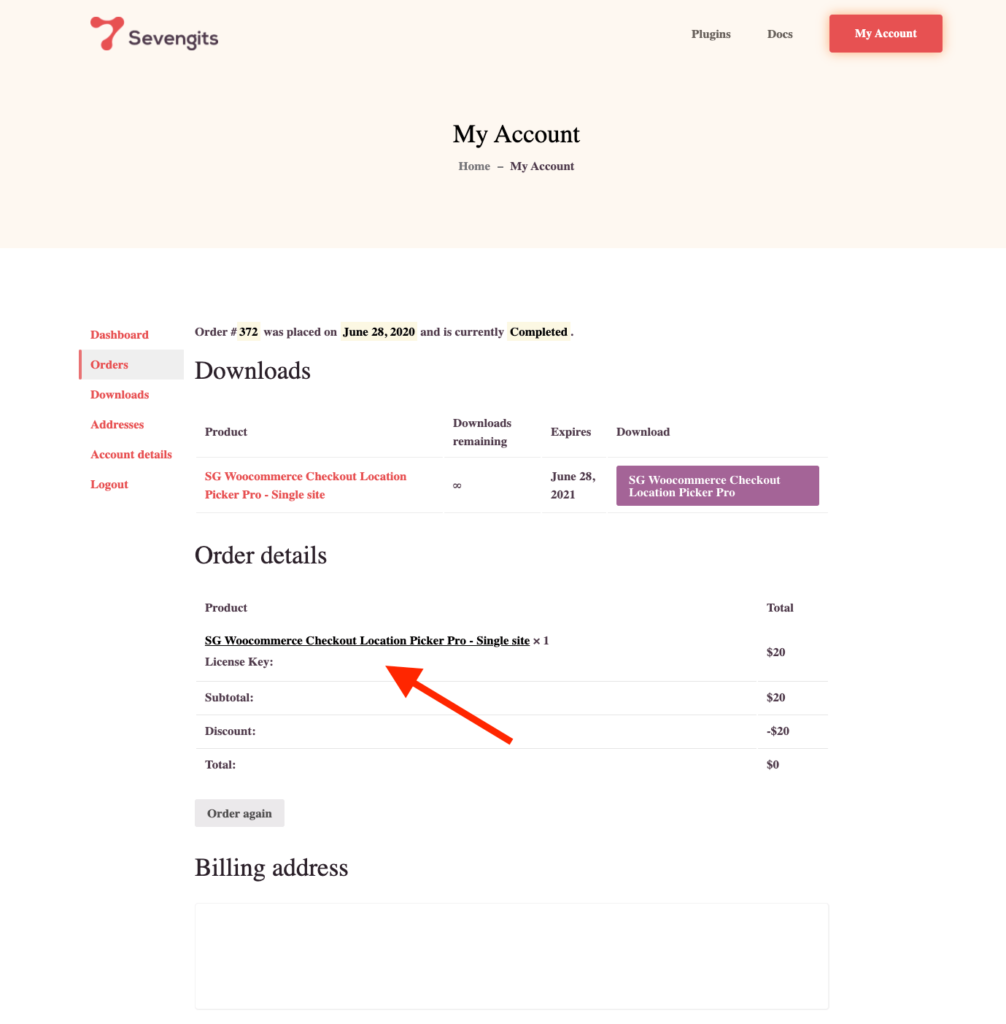
woocommerce checkout location picker – Get a License Key
You will get the license from your Sevengits account. All license keys are valid for a year from the day of purchase. After completing the order, you will get an email from us with a link to access your account. From your account, you can download the Plugin to your system.
Minimum Requirements woocommerce location picker
- WooCommerce 4.0 or greater
- WordPress 4.0 or greater
- PHP version 5 or greater
- MySQL version 5.6 or greater
Upload via WordPress Admin Panel
This is the most common method everyone uses. No coding knowledge is required.
- Login to your WordPress website Administration Panel
- Navigate to the Plugin → Add New.
- Click on Upload Plugin button
- Choose the plugin zip file you have just downloaded.
- Click on the Install Now button.
- Once the installation is complete, click on Activate Plugin to activate the installed Plugin.
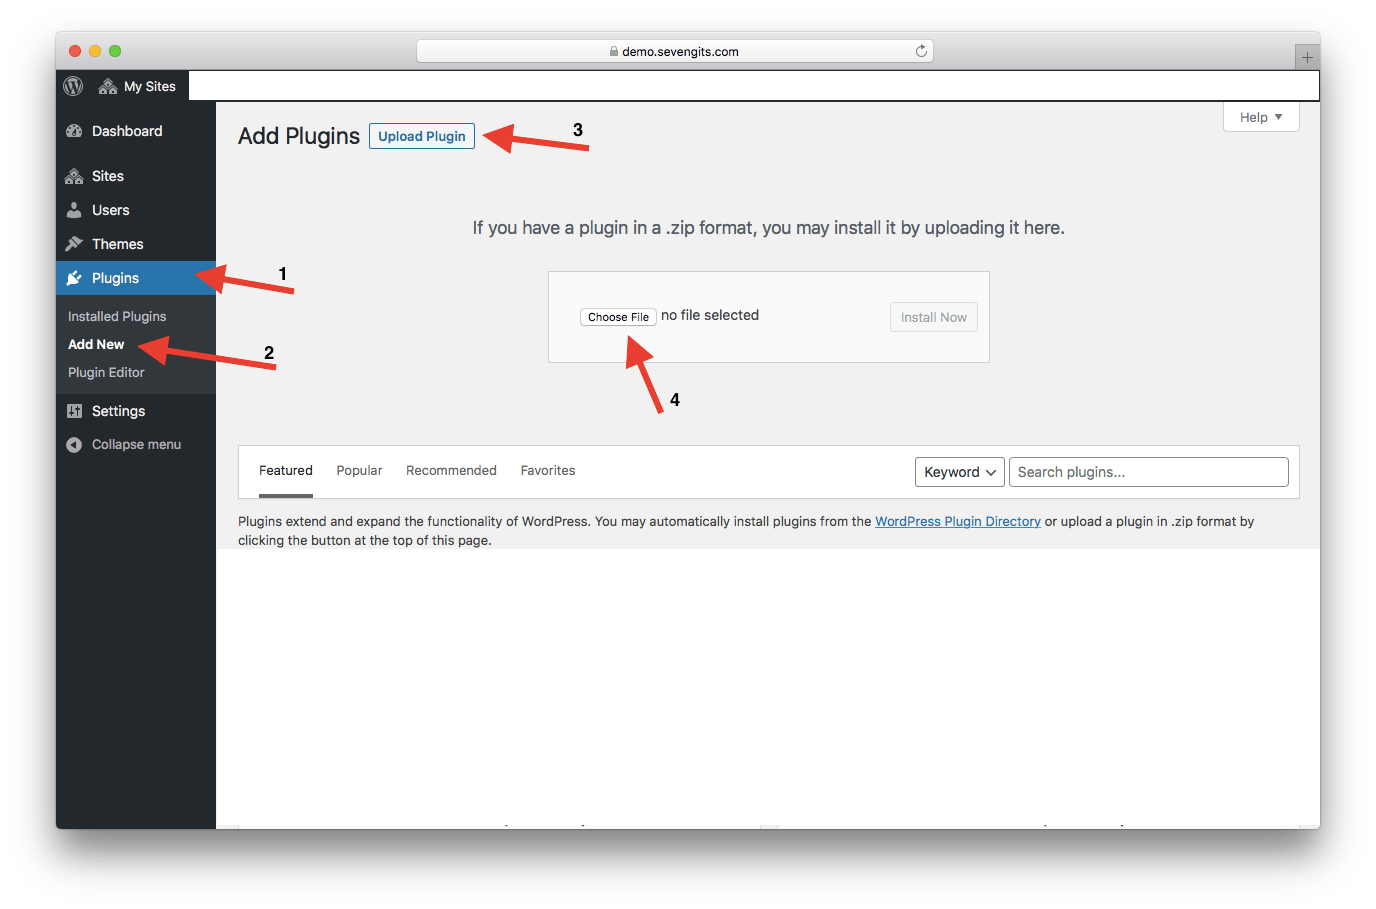
Now you’ve finished installing the Pro version of WooCommerce Checkout Location Picker.
Upload via FTP
- Extract the downloaded plugin zip file.
- Upload the folder to your server via FTP to the plugins directory on your WordPress installation (wp-content → plugins).
- Activate the plugin on the Plugins Admin page.
Activation
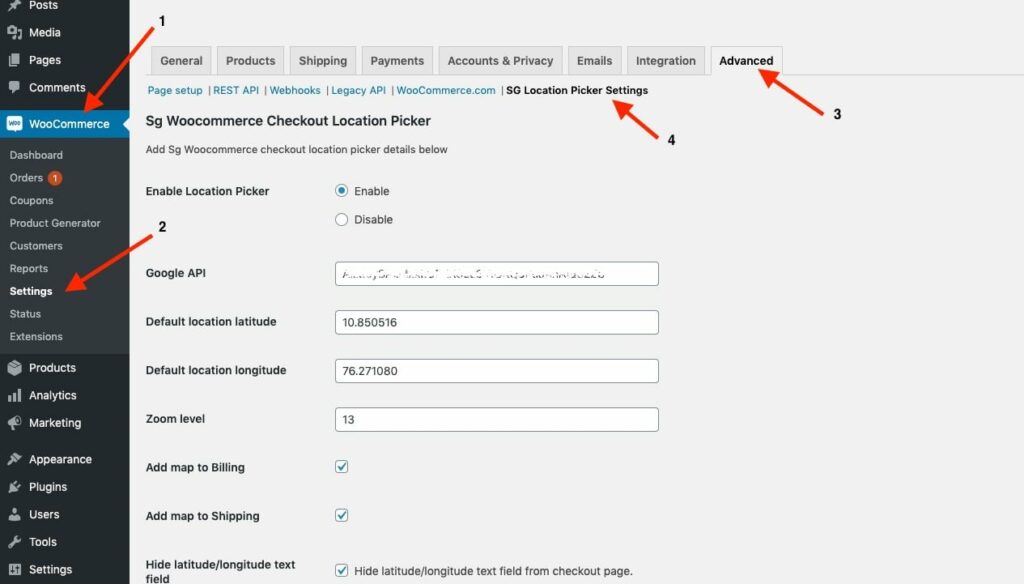
Go to WooCommerce -> Settings -> Advanced tab -> SG Location Picker Settings. -> Click Enable
Now you’ve enabled the plugin on your website.
Configuration
Get your Google API Key
This plugin uses the Maps feature. You have to obtain an API key to embed on your website.
To get an API key:
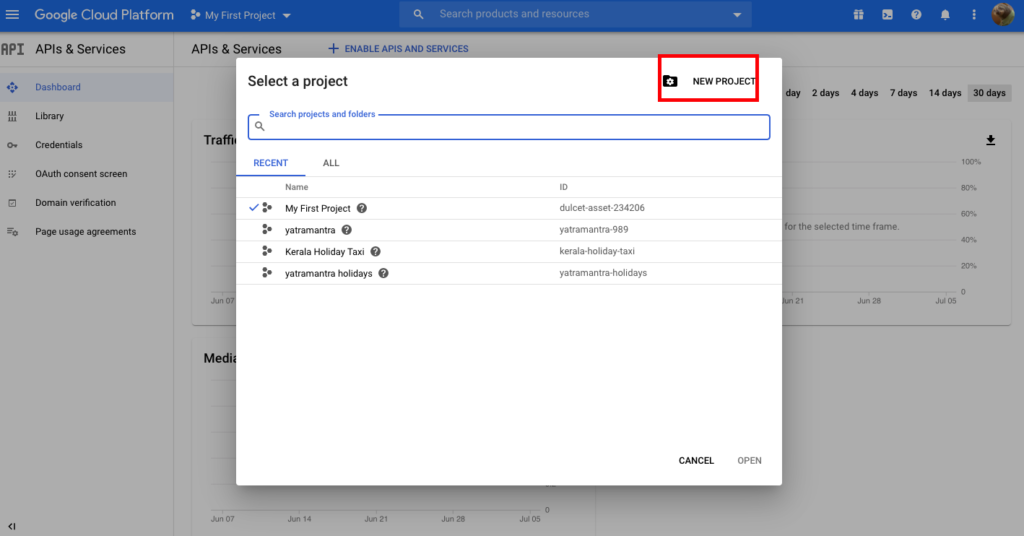
Go to the Google Cloud Platform Console.
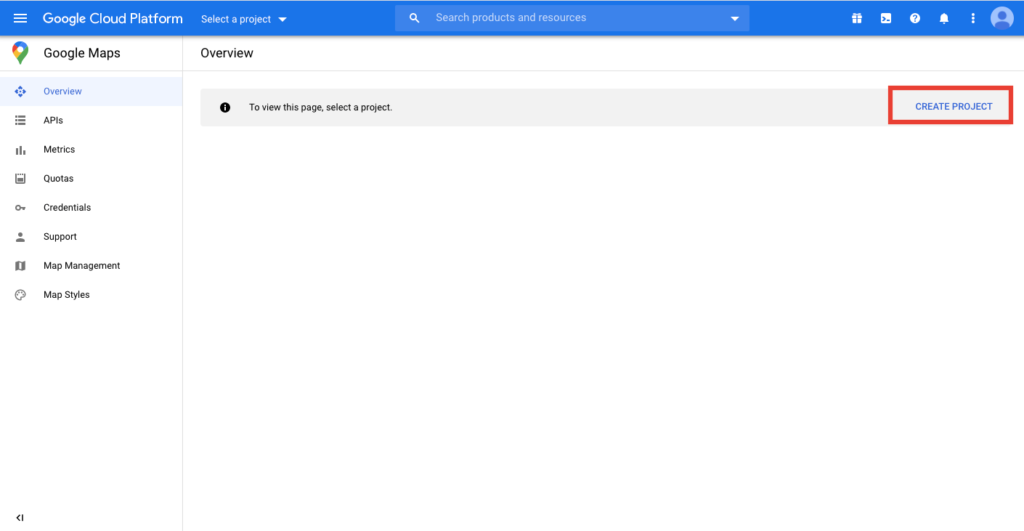
Click the project drop-down and select or create the project for which you want to add an API key.
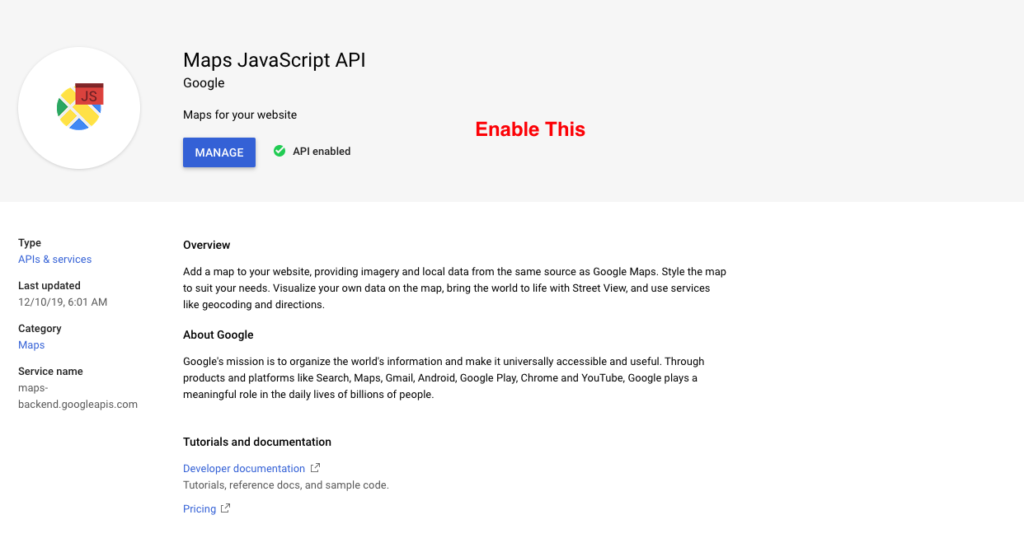
Click Library and Enable Maps Javascript API
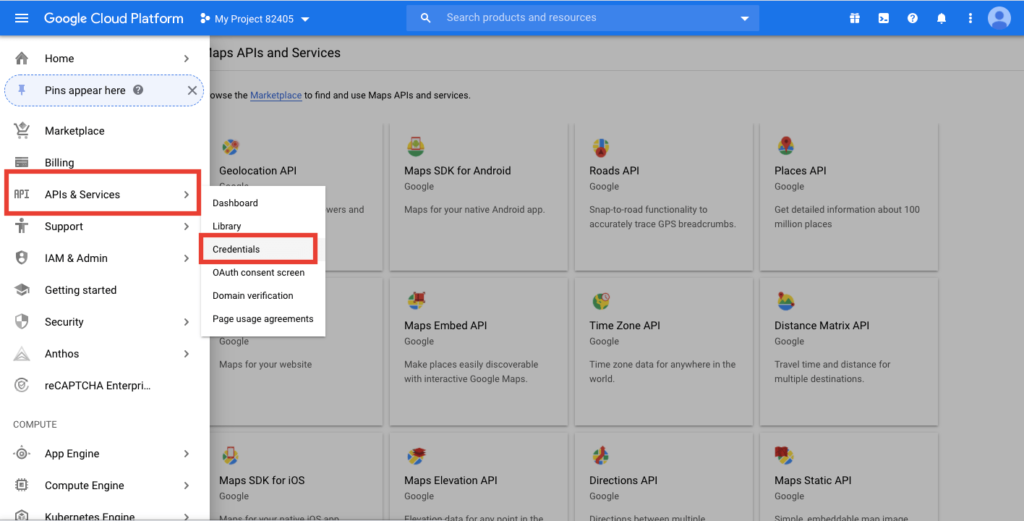
Click the menu button and select APIs & Services > Credentials.
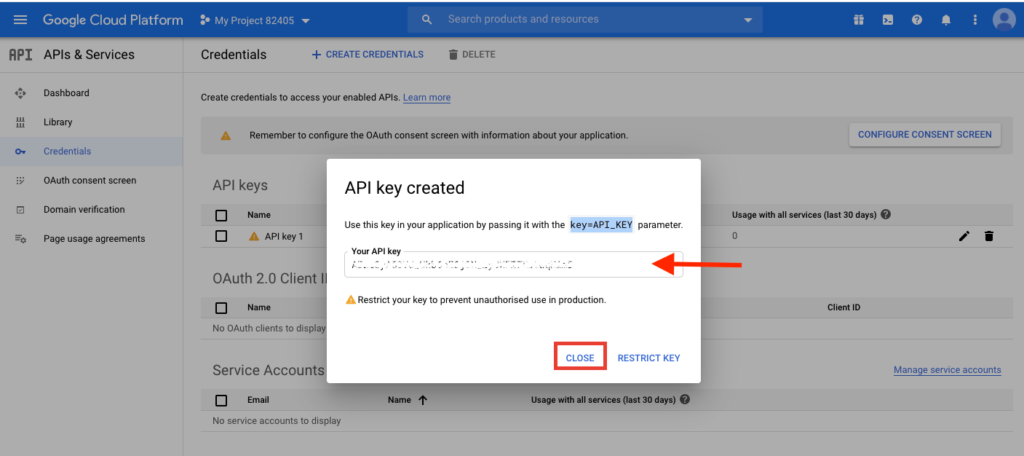
On the Credentials page, click Create credentials > API key. The API key created dialog displays your newly created API key.
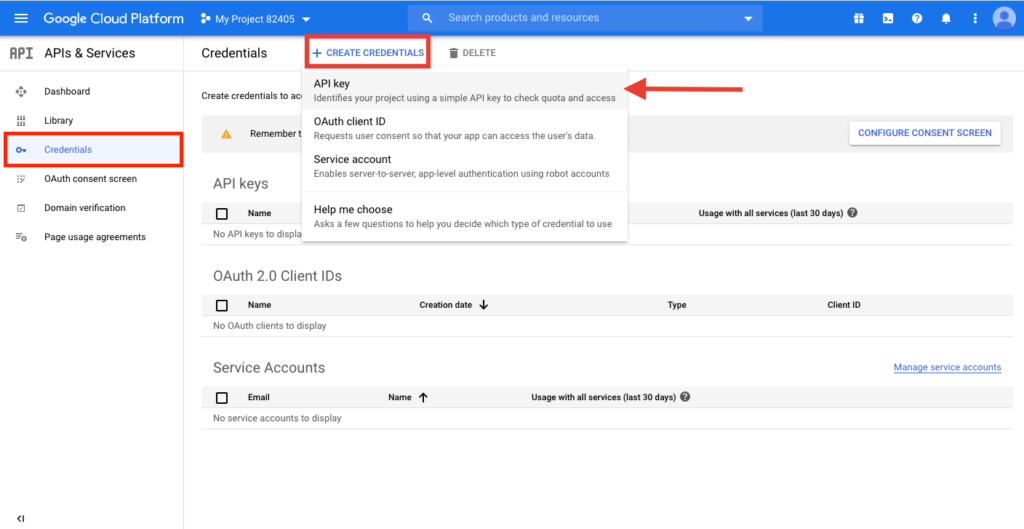
Copy the License Key and Click Close. The new API key is listed on the Credentials page under API keys. (Remember to restrict the API key before using it in production.
How to restrict Google API Key?
We recommend restricting the API key before using it in production. If you don’t restrict your API it will be visible in the browser Console.
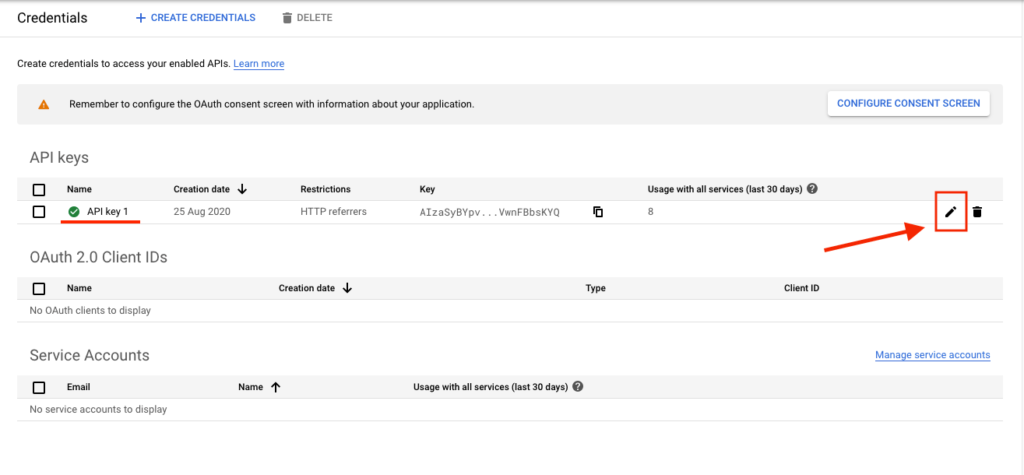
On the Credentials page, click the edit icon or the name of the API key that you want to secure.
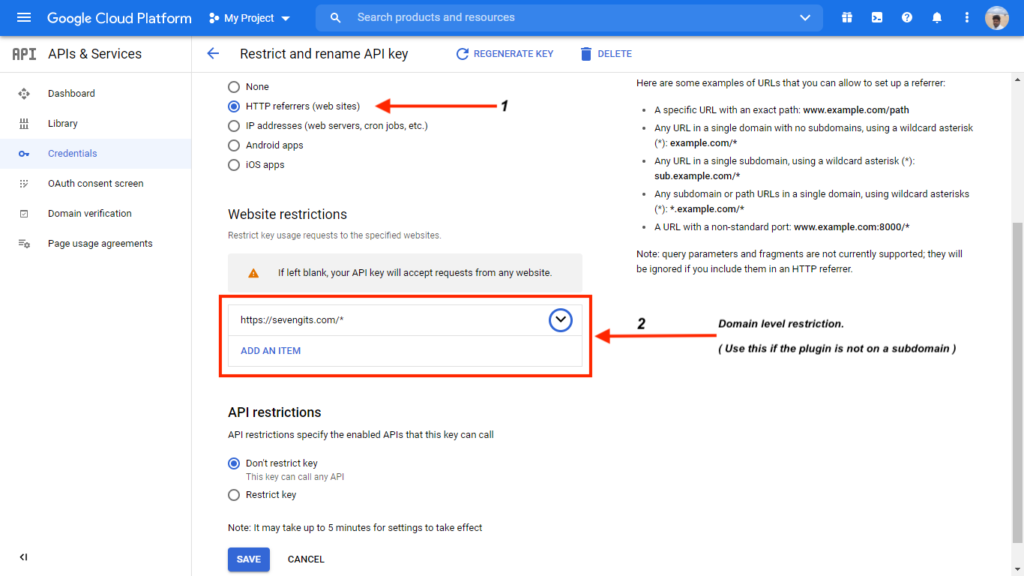
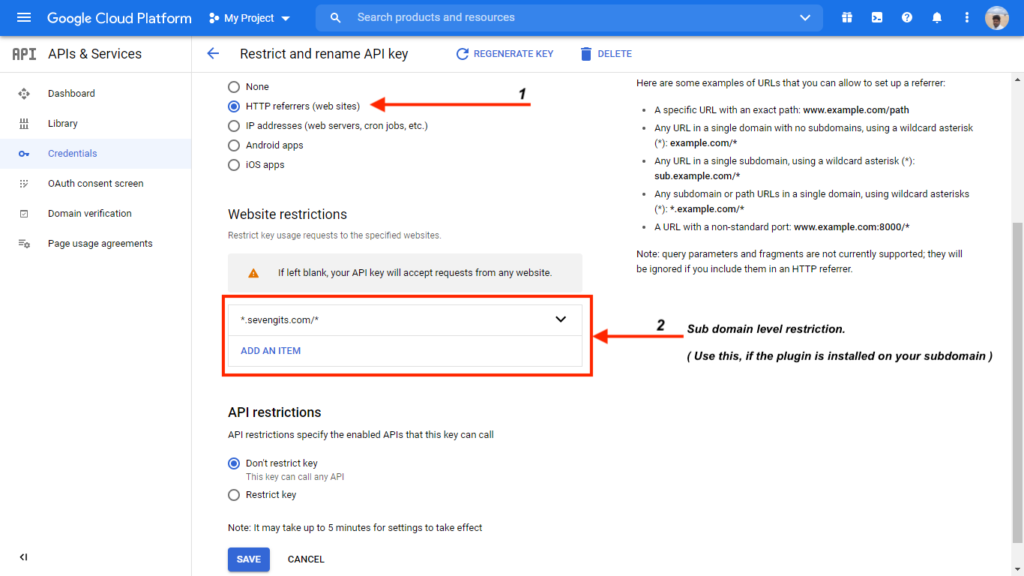
On the Restrict and Rename API key page, set the Application restrictions as HTTP referrers (websites).
If the plugin is installed on your main domain, follow the instructions below screenshot.
If the plugin is installed on your subdomain, follow the instructions below screenshot.
On the API restriction, select Don’t restrict Key.
Don’t forget to click Save.
Note: if you are restricted API for a domain in multiple email accounts then first created API only works. The remaining will not work. So if you added multiple apis for a single domain and restricted then make sure that unwanted APIs are removed.
Explaining settings
Default Location Longitude / Latitude.
This feature is very helpful for those businesses that have customers from a particular area/country.
By giving a default location here, the map will automatically be set to the default location for the end users. This will make it easier for them to locate the nearby areas.
Latitude and longitude are necessary for locating a place.
Zoom level
This helps you to control the zoomed map view. If you are providing services in a short area, you can zoom the map closest to your region.
Add Map to Billing / Shipping
Sometimes, billing and shipping addresses might be different. Using this feature, you can control the appearance of the Location Picker Map only to the shipping address or to both.
Hide Latitude / Longitude text field
Tick this option if you don’t want to show a latitude and longitude field to the customer.
[ screenshot of latitude longitude field in checkout page ]
License Key
Here, you need to enter the license key from your Sevengits account. Click on save changes after any edits on the page.
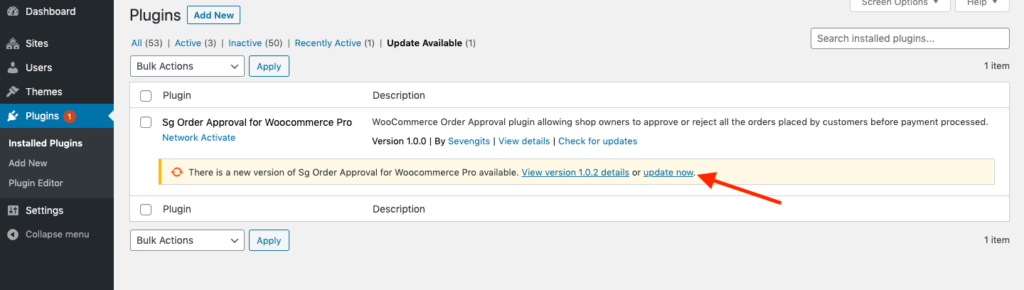
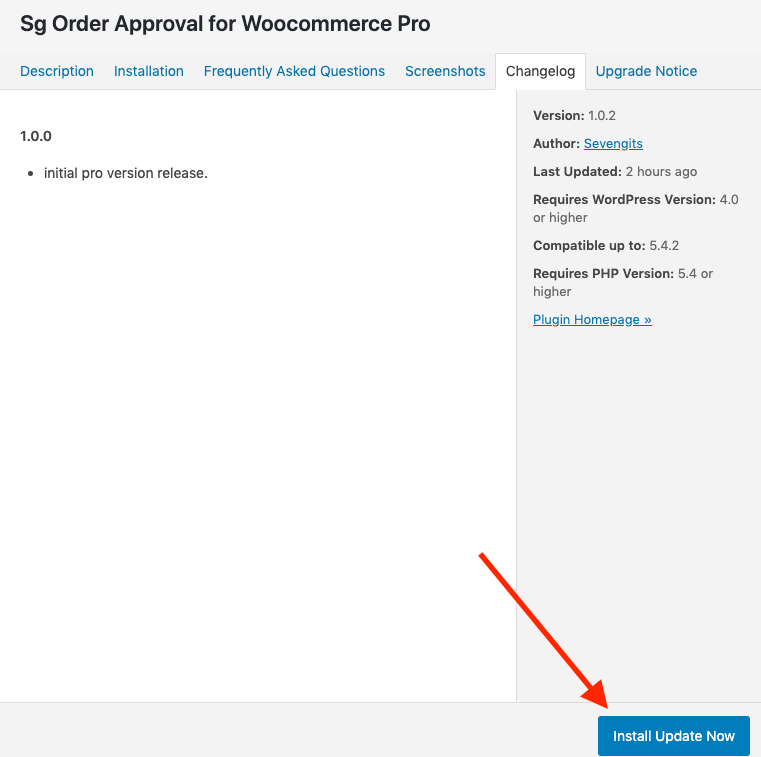
Update
You will be notified about new feature updations along with a changelog. You can read about the fixes and features and can update our premium plugins like how you update other WordPress plugins.
Support
If you purchased a premium version from us with a valid license key ( Kindly mention your license key in the subject line ). Contact us.
SG Woocommerce Checkout Location Picker